Krucial Connected Seafarm application
Select a site
In the left hand menu the top option will be displayed as the site you are currently viewing. To view another site, click on this and a list of the sites available to you will be shown:
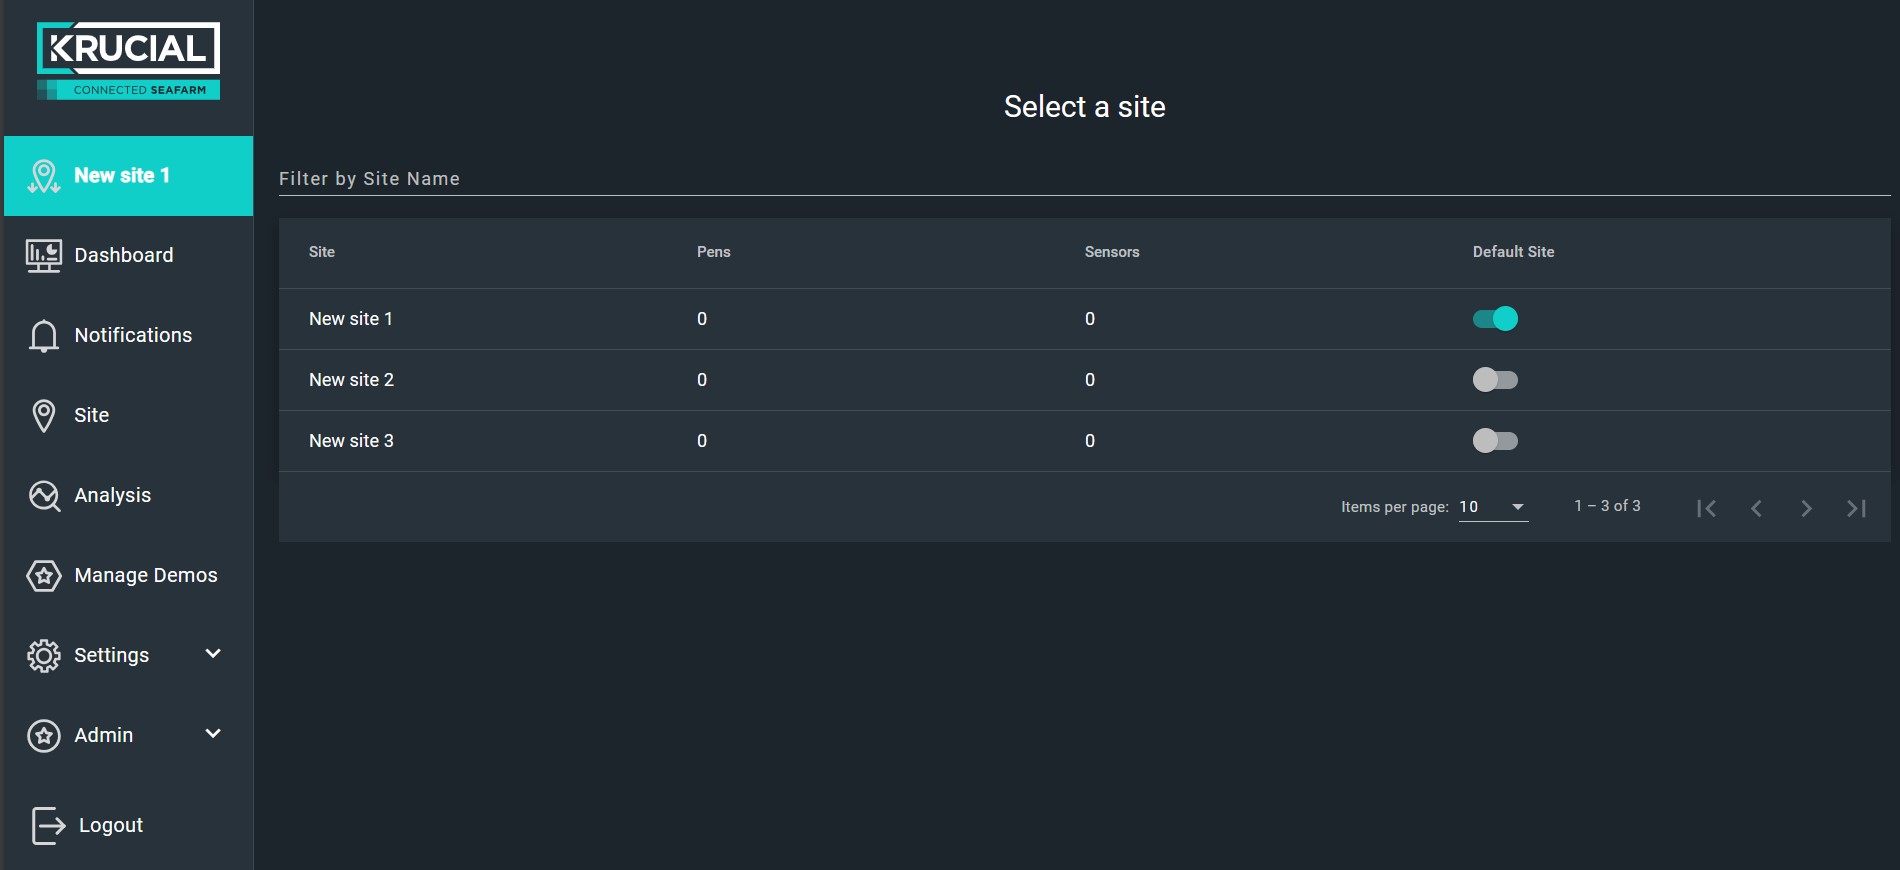
Initially, this page will redirect you to Create a new site. After completing this step, your Select a site page will reflect the image shown above.
If you would like the Dashboard for a specific site to always be displayed to you when you log in, press the toggle switch for this site under Default Site.
Dashboard
The dashboard displays a panel for each sensor and their most recent readings:

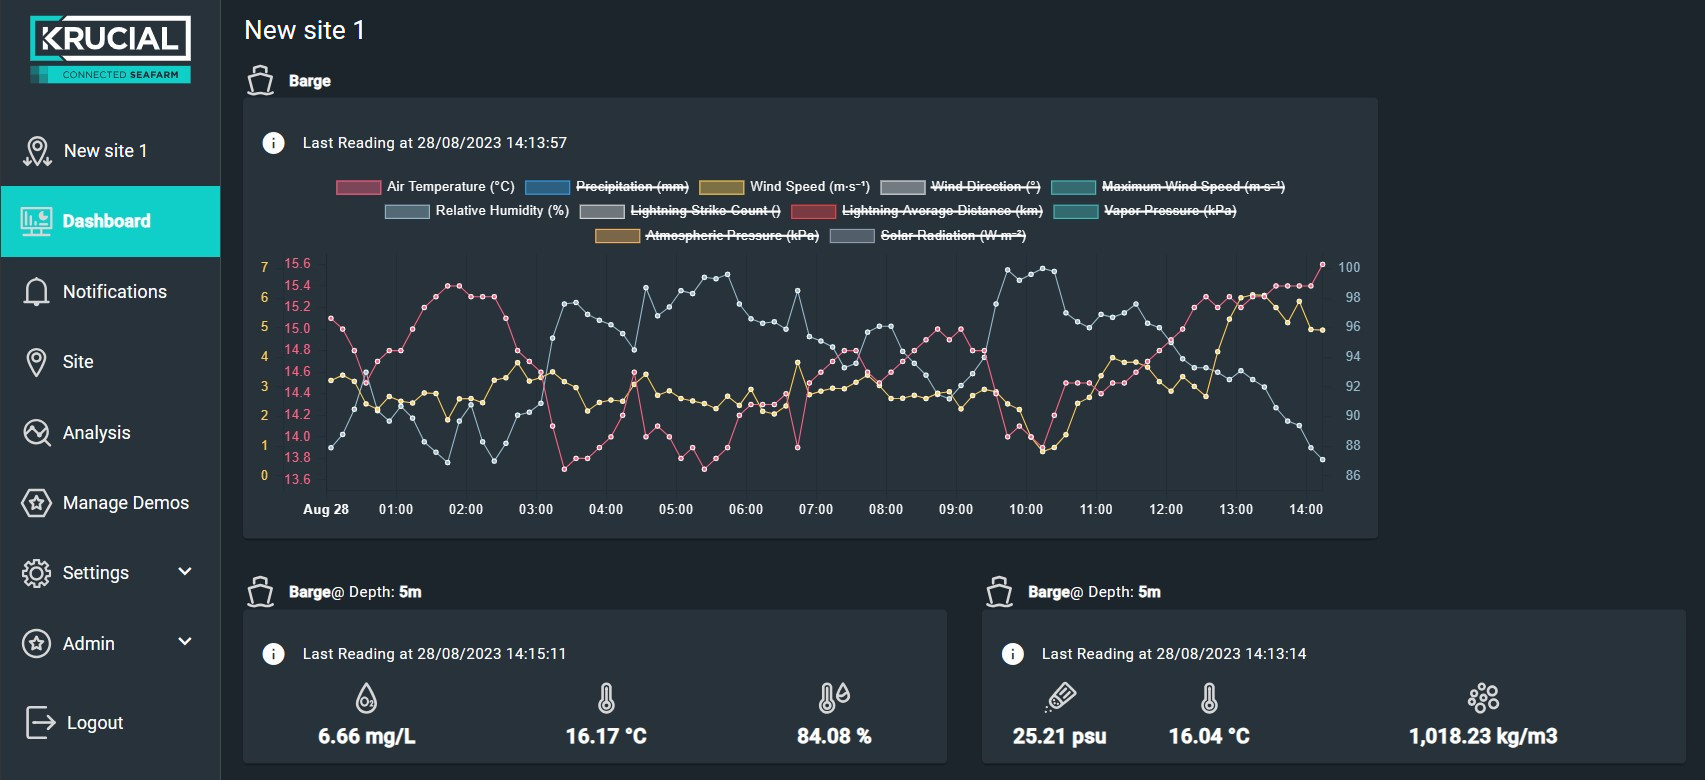
Clicking anywhere on the panel toggle between a view of the most recent readings and the graph view. The mouse scroll wheel can be used to zoom on the graph.
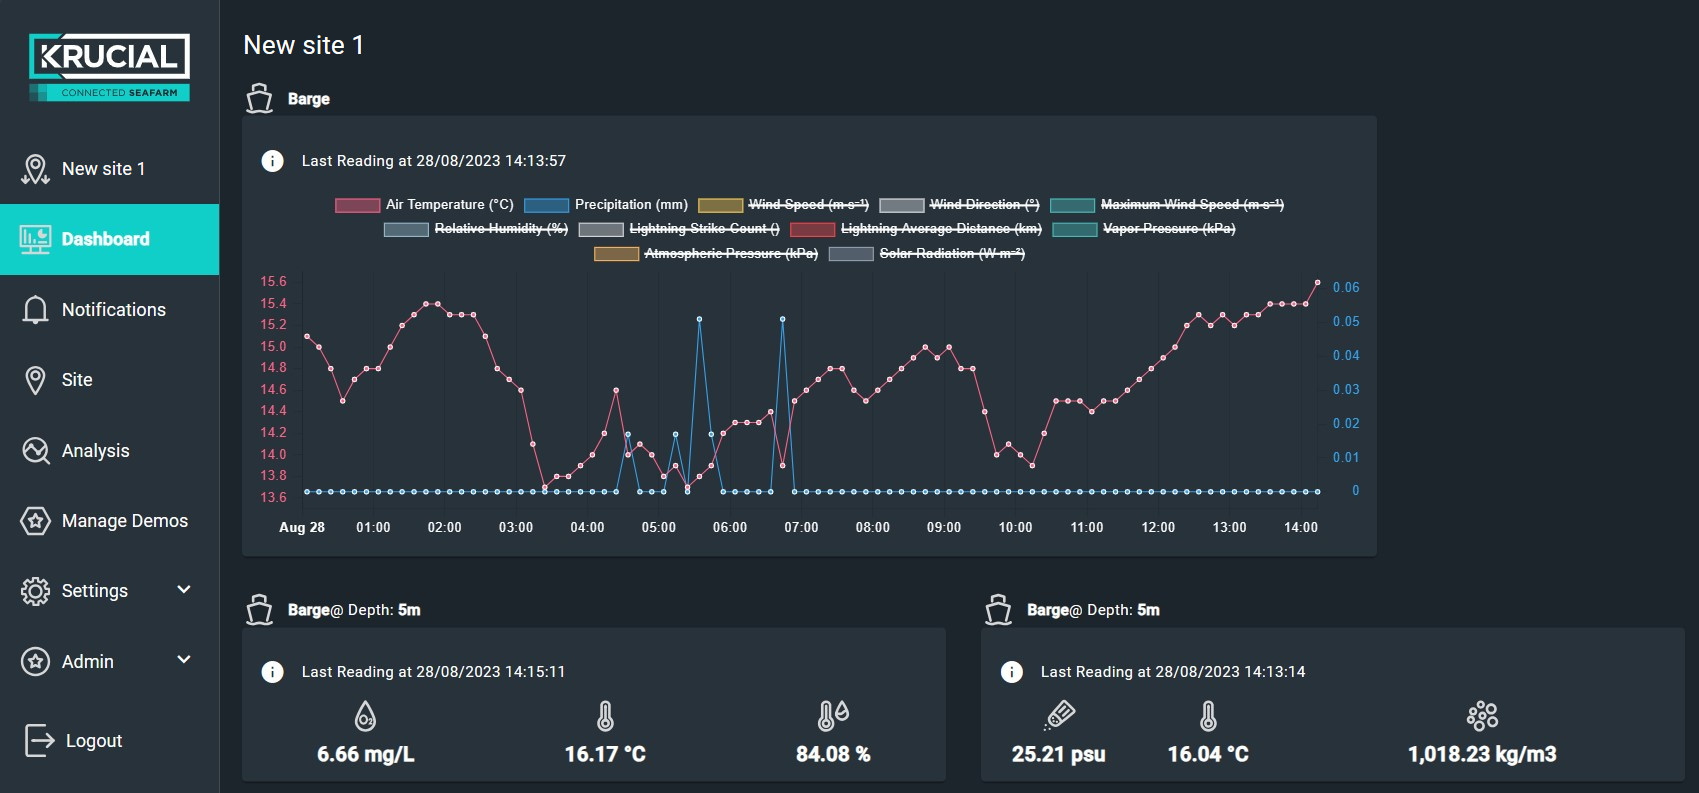
Clicking and dragging your mouse across the graph will display different time ranges once zoomed in. Clicking on any of the parameters above the graph will show/hide them:
Notifications
Notifications has two tabs, Alerts and Events.
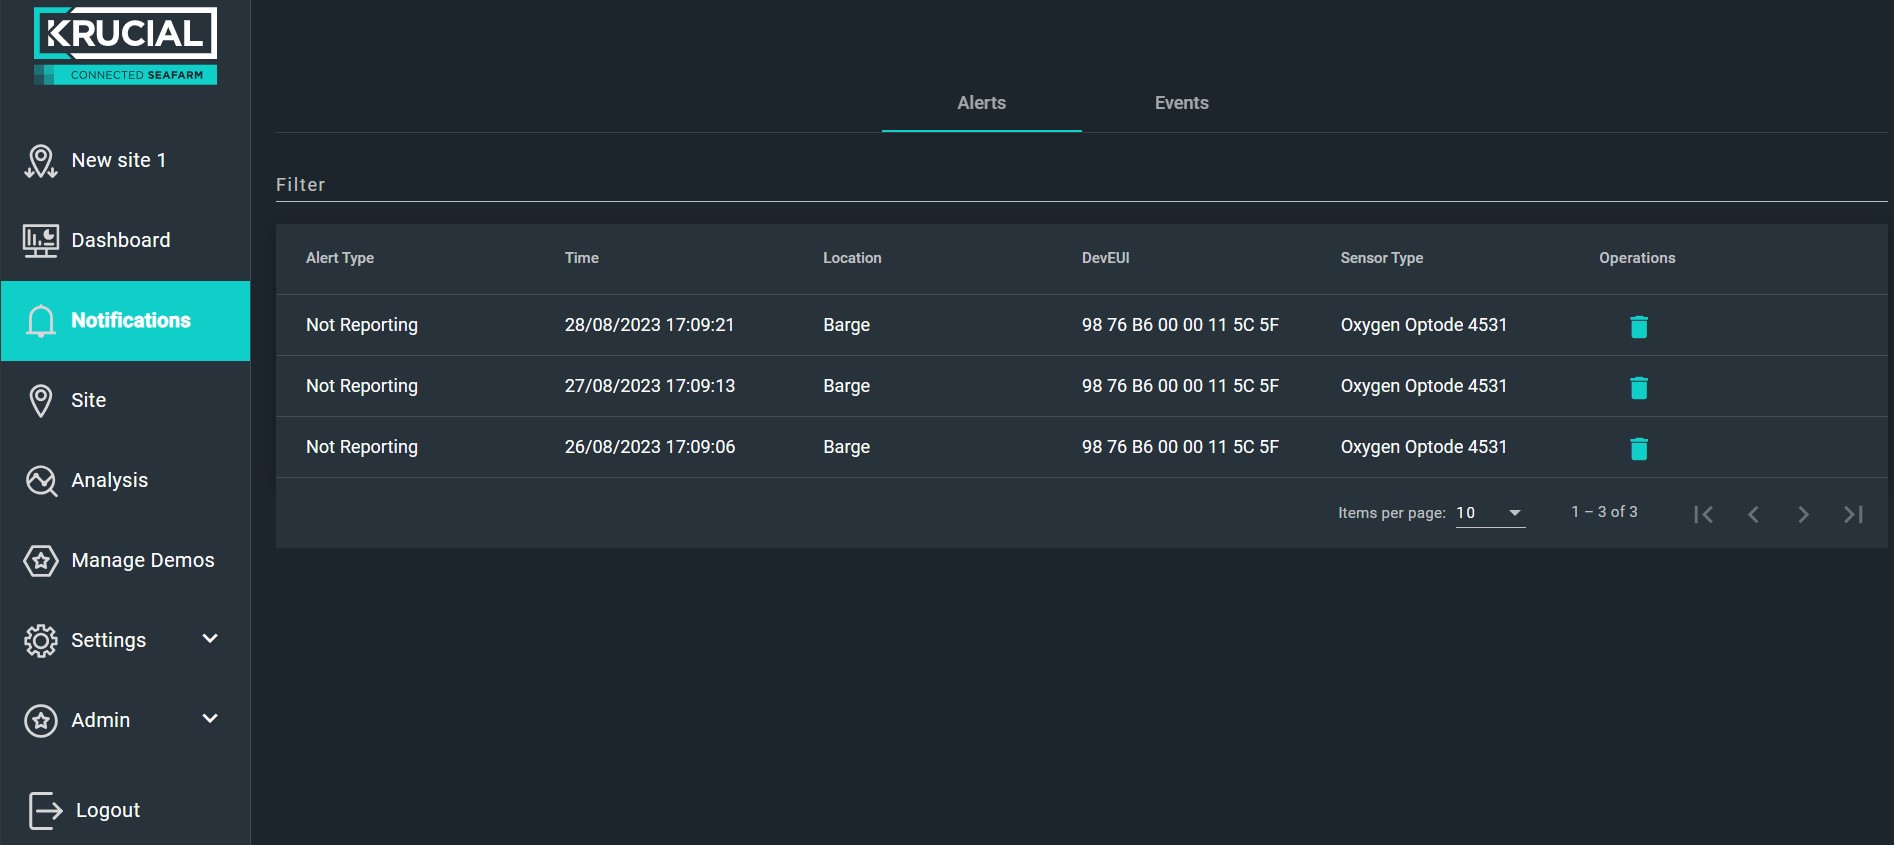
The Alerts tab contains any sensor/device alerts for the site, such as device 'Not Reporting' or 'Threshold Triggered'.
By default, all Alerts will be cleared to Events after 7 days, but this can be changed in Site > Settings > Site wide Alert Cleanup Period.
Alerts can be deleted manually, or moved to Events if action has been taken on them. Press the  icon to the right of the alert:
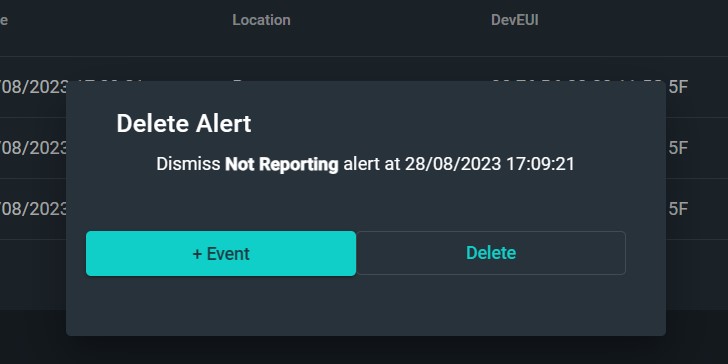
Clicking + Event will bring up the following options to log as changes made to deal with the Alert:
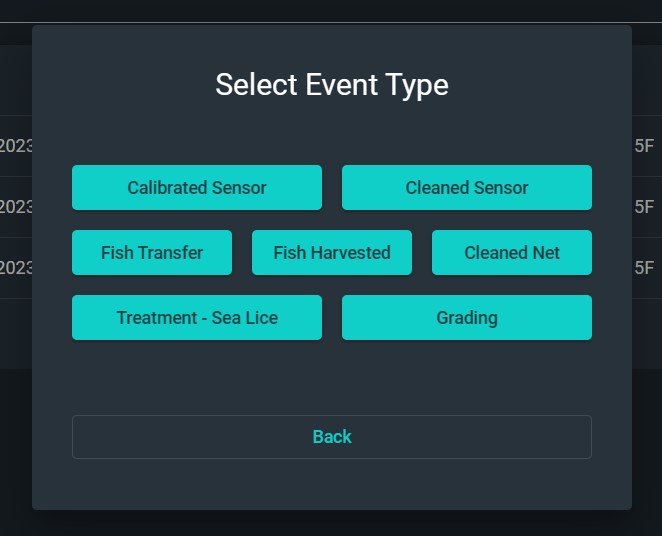
After selecting the event type, you will be prompted to enter the Location and Sensor from drop down menus, as well as any optional notes.

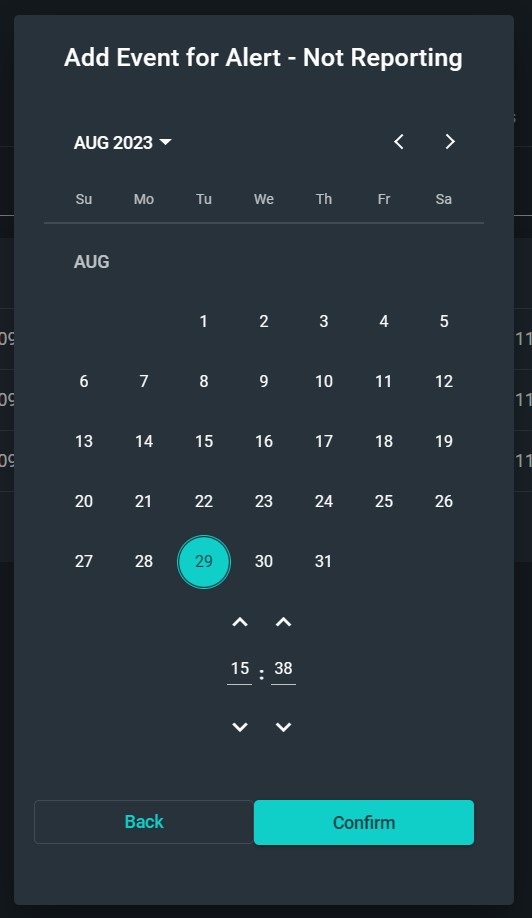
The next prompt will be to enter a time at which the Event was carried out:
The Alert that has been converted to an Event can now be seen at the top of the Events list, with the time at which the action was carried out:
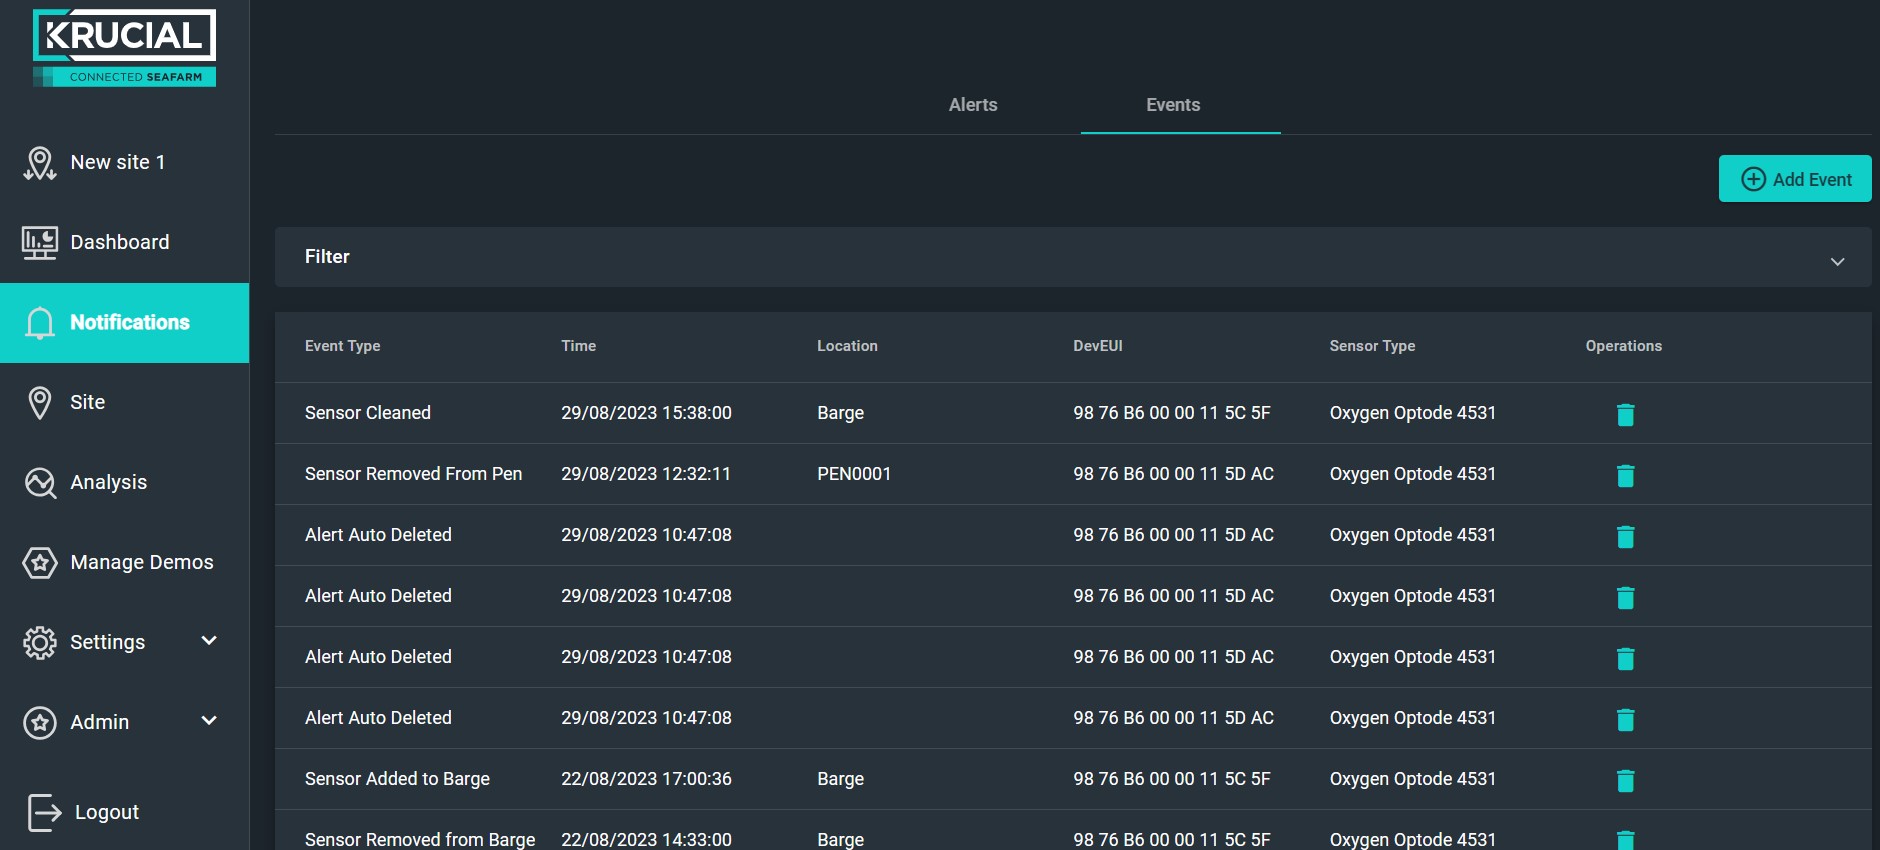
The Events list automatically logs all Connected Seafarm site actions carried out, including adding, removing, and moving of sensors, as well as any Alert that has been auto-deleted.
By clicking the + Add Event button, Events can be added manually, with the same options as when converting from an Alert.
Site
Site is used for setting up and configuring devices across different locations. The tabs in Site are:
Site > Sensors
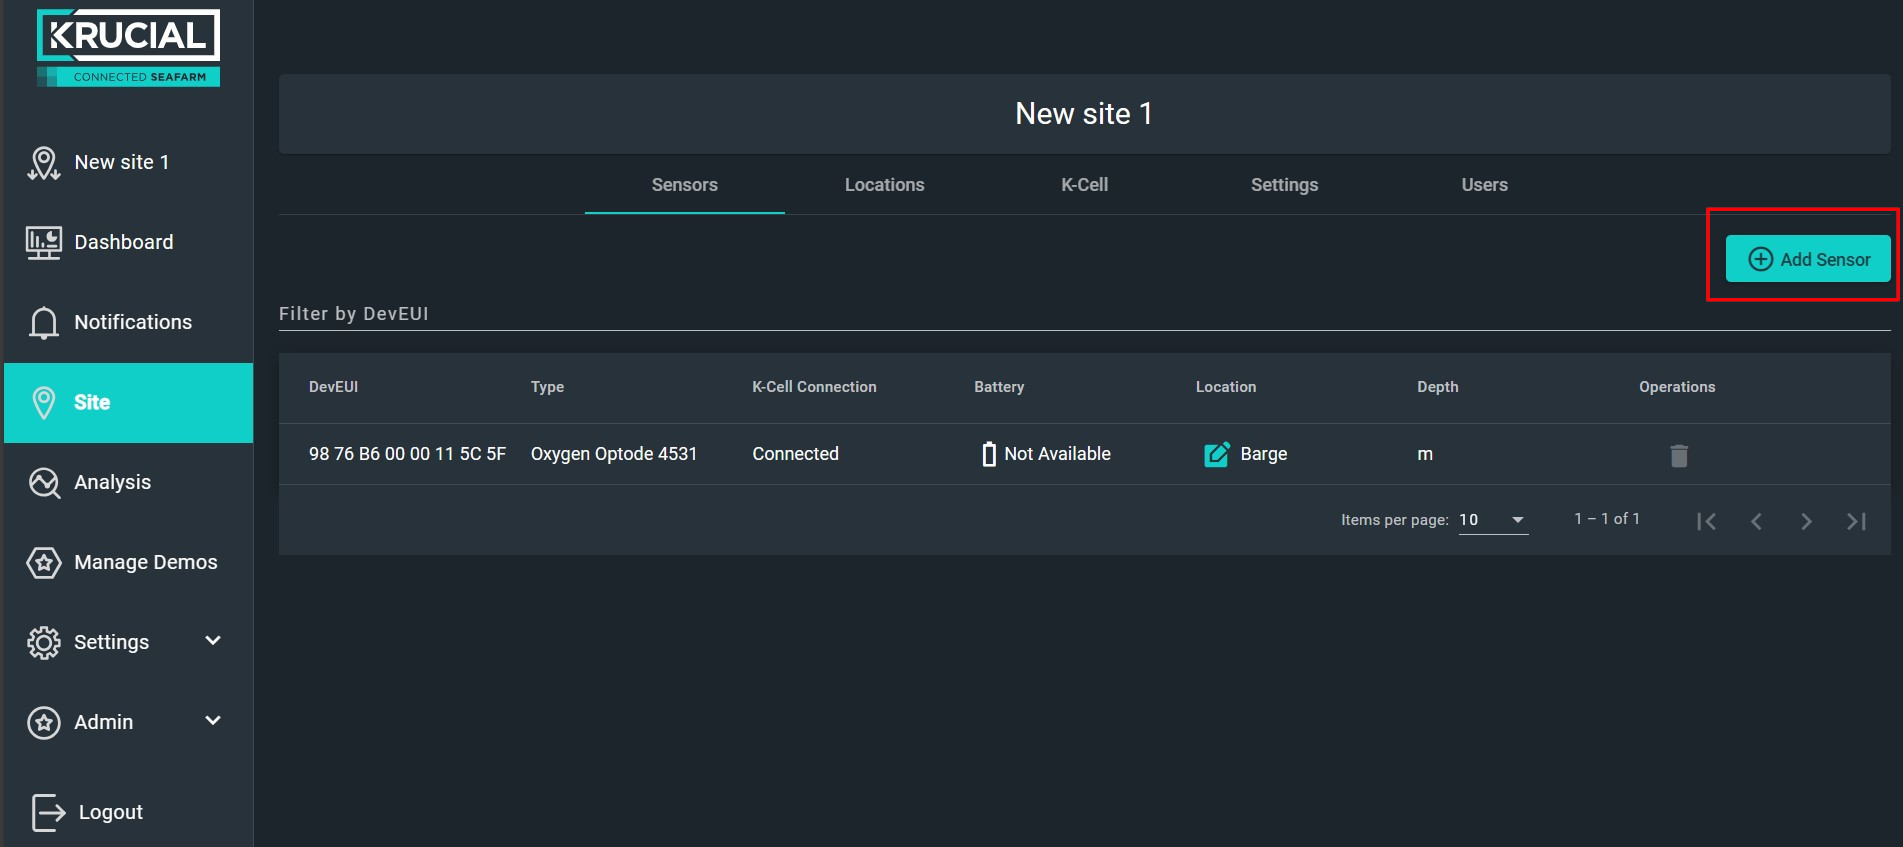
The sensors tab enables adding and removing of sensors on a site. It also allows moving sensors to a different position on a site.
Adding a Sensor to a Site
Click on the Add Sensor button.
The following "Create Sensor" form will be presented:

Select the correct type of sensor from the list and enter the DevEUI and App Key. Once complete click Next:
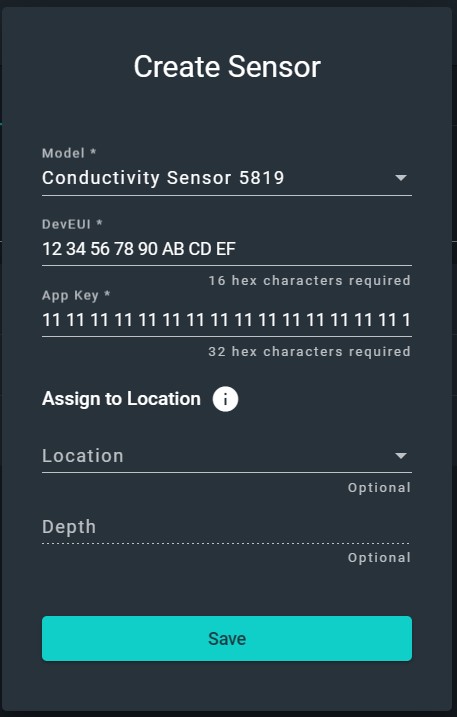
Location and Depth can be entered now or entered at a later date by clicking Skip.

Finally, you will be prompted to review a summary of your sensor. You will have the option to edit your details or location, or simply Save the device as is:

The sensor has now been added to the site and can be seen in the Sensors tab list:
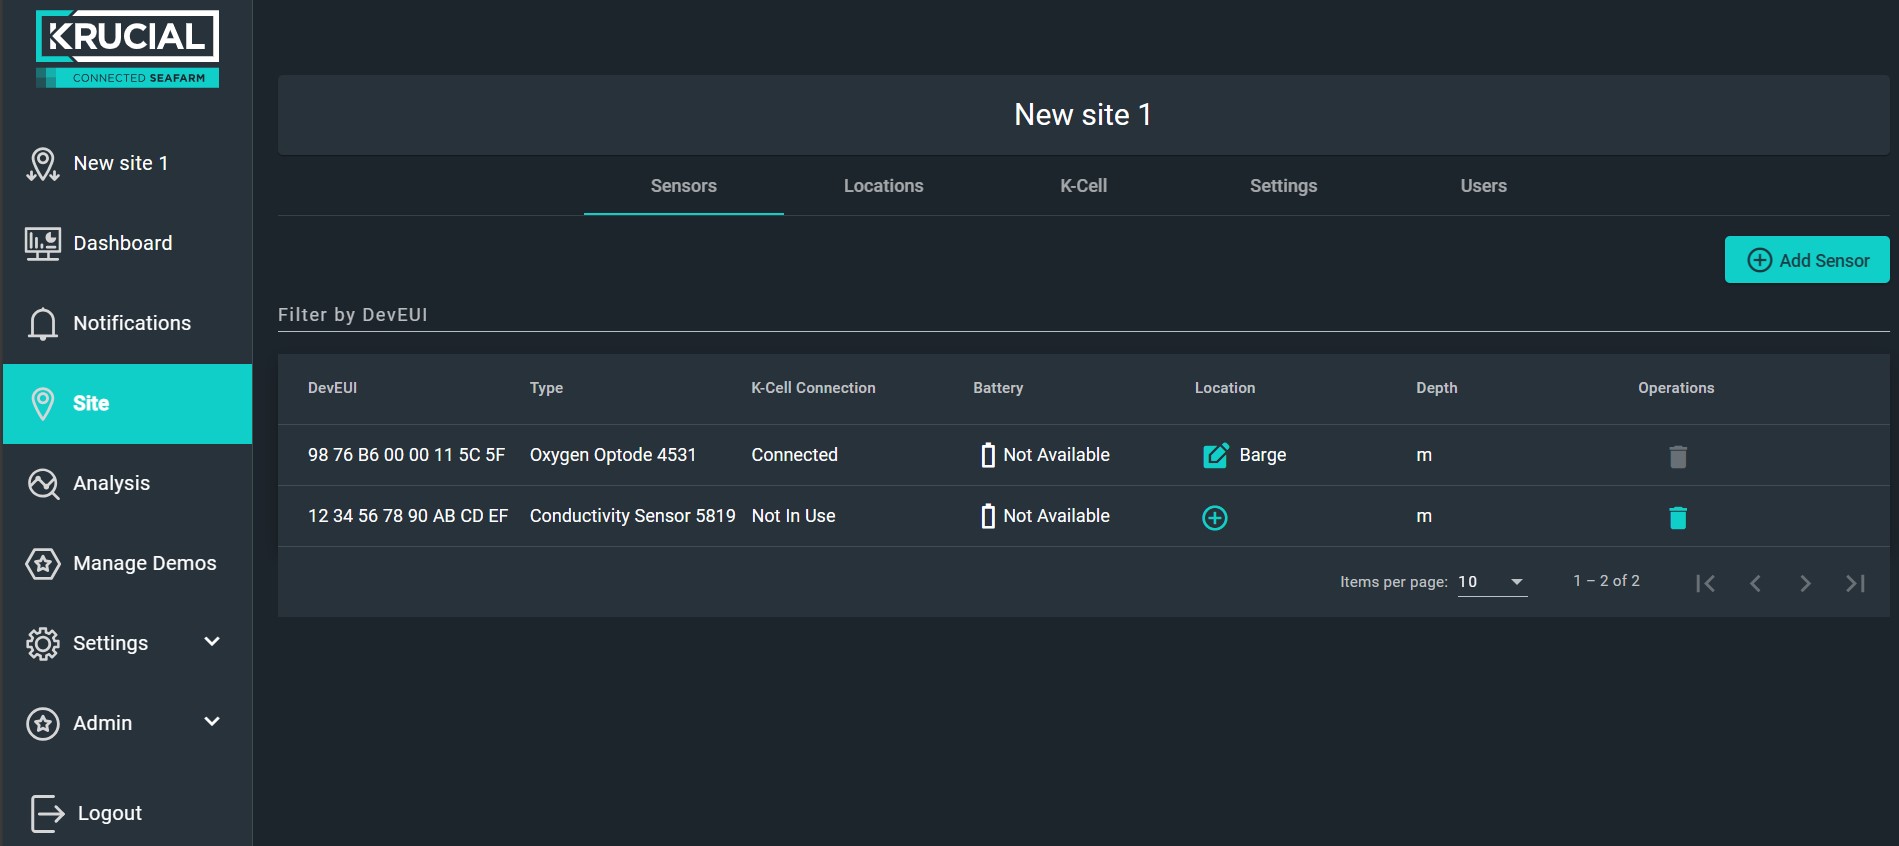
Placing a Sensor
NOTE - a sensor will not communicate with the K-Cell until it is placed in a Location on the Site. If you have not yet created any Locations, please do this first. Instructions can be found in Site > Locations.
A confirmation that the sensor is now placed will appear at the top of the screen, and the Sensors list location will update.
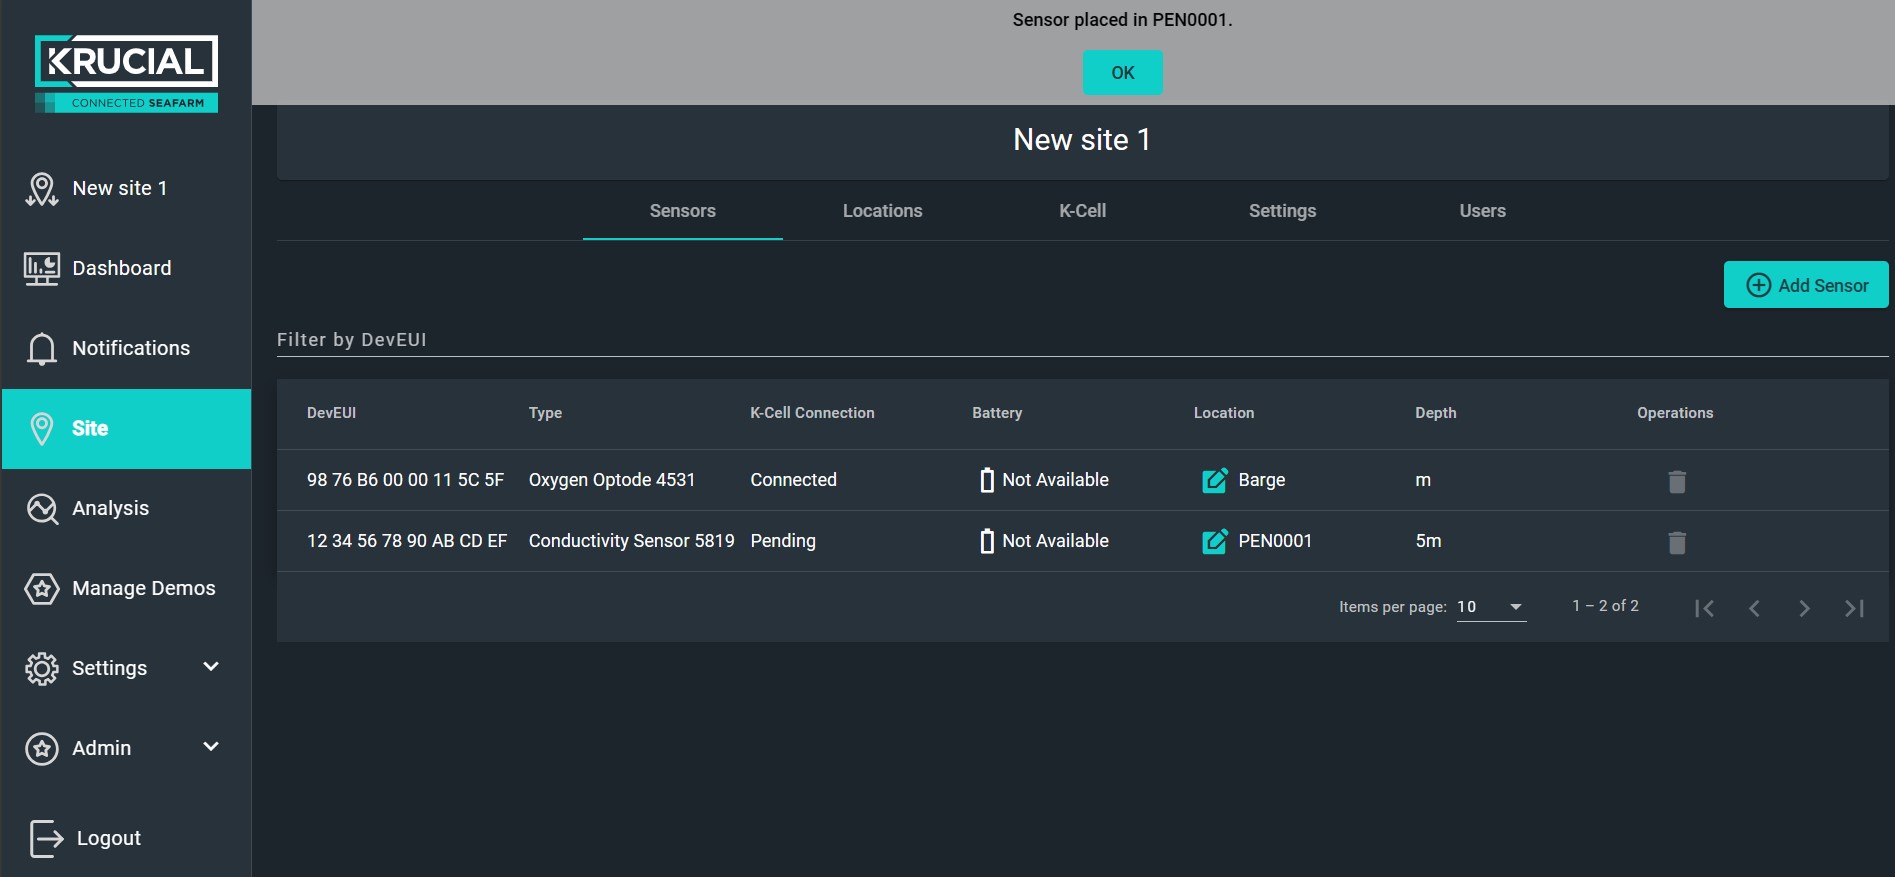
The sensor's information will now syncronise with the site's K-Cell. Depending on the frequency agreed for data backhauls, it may take up to 2 hours for your first sensor reading to be displayed on the Dashboard or Analysis pages.
Moving or deleting a Sensor
To move or delete a sensor, click the  icon underneath the Operations column.

Here, you will be able to see a summary of the selected sensor including device details, location, and advanced configuration options. (NOTE - moving or deleting a sensor will clear its historical data from the graph views).Select the  icon again next to Location. This can be used to move or change the depth of the sensor.

To simply move the sensor to a new location on the same site, click on the Location dropdown menu and select the desired location name. Save the selected location by pressing Confirm. To delete the sensor, you must unassign its location first. Do this by clicking on the Location dropdown menu and selecting the blank option, like:

Confirm your decision to disconnect the sensor from its location and the cell by pressing Save at the bottom of the Summary page again.

After unassigning the sensor from the location you will be able to remove it from your site. Do this by clicking the  icon which will now be selectable. Confirm the removal.
If you would like to move the sensor to a new site/K-Cell, delete the sensor from the site by clicking on the  icon and confirming the warning:
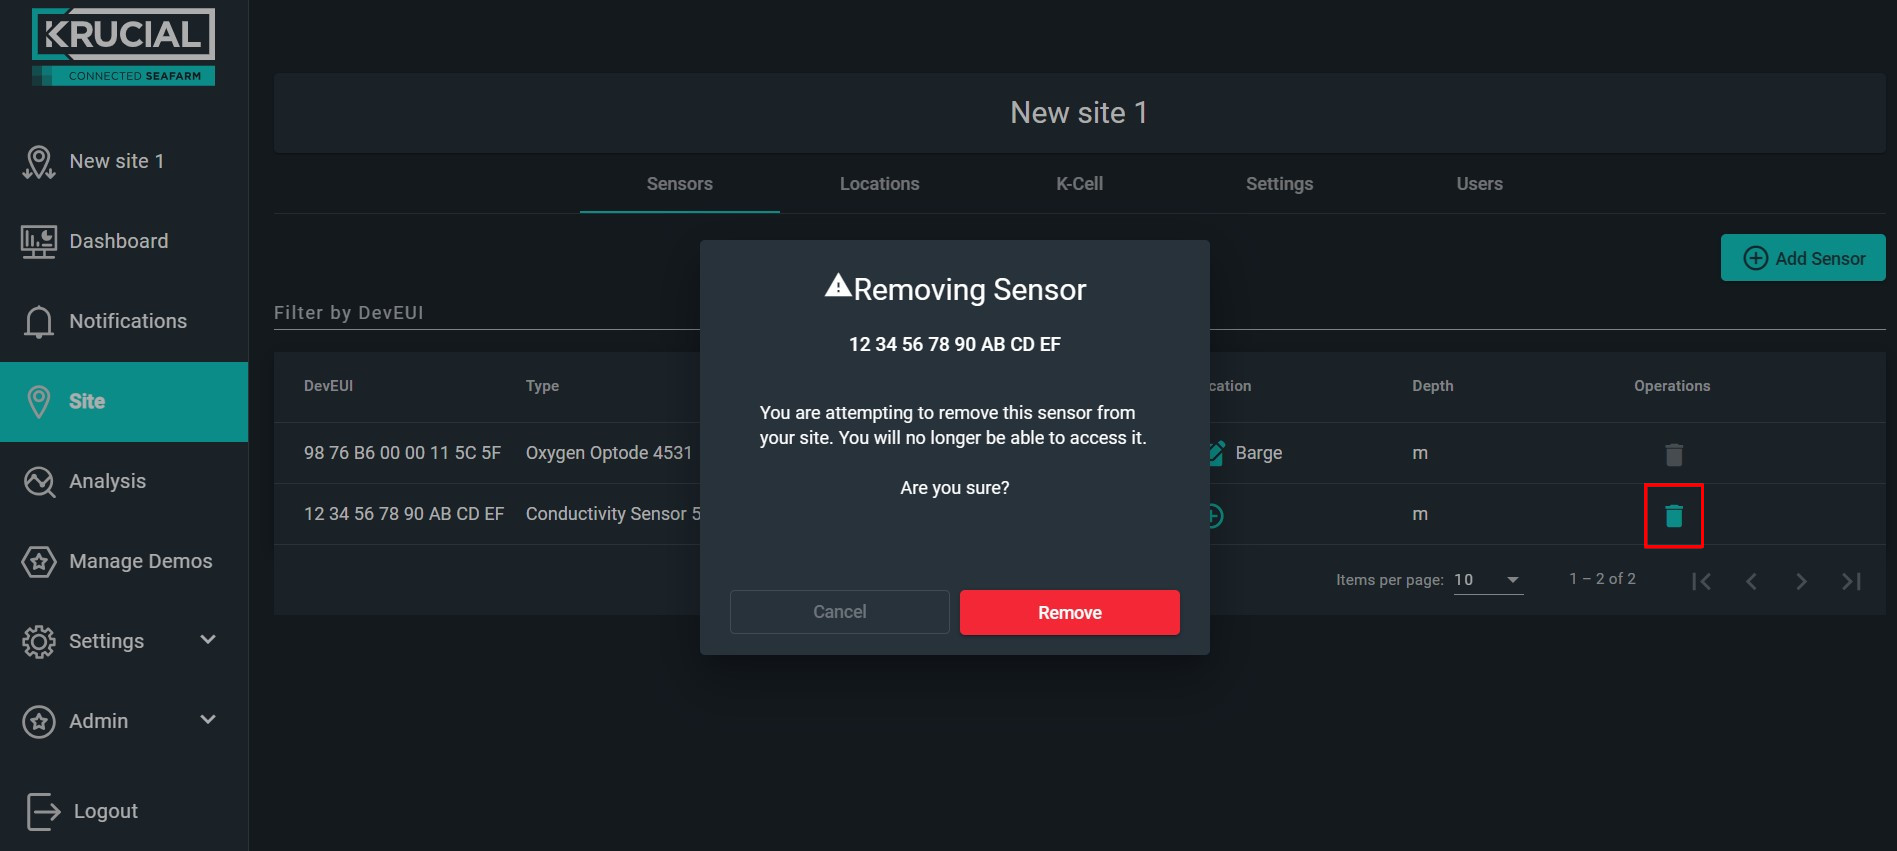
The sensor is now deleted from the site, but still available to your organisation. As an Admin, go to Admin > Sensors where you will be able to assign the sensor to another site in your organisation.
Site > Locations
The Connected Seafarm requires Locations to be set up so that sensors can be placed. Once sensors are placed, they will synchronise with the sites K-Cell.
Adding Locations
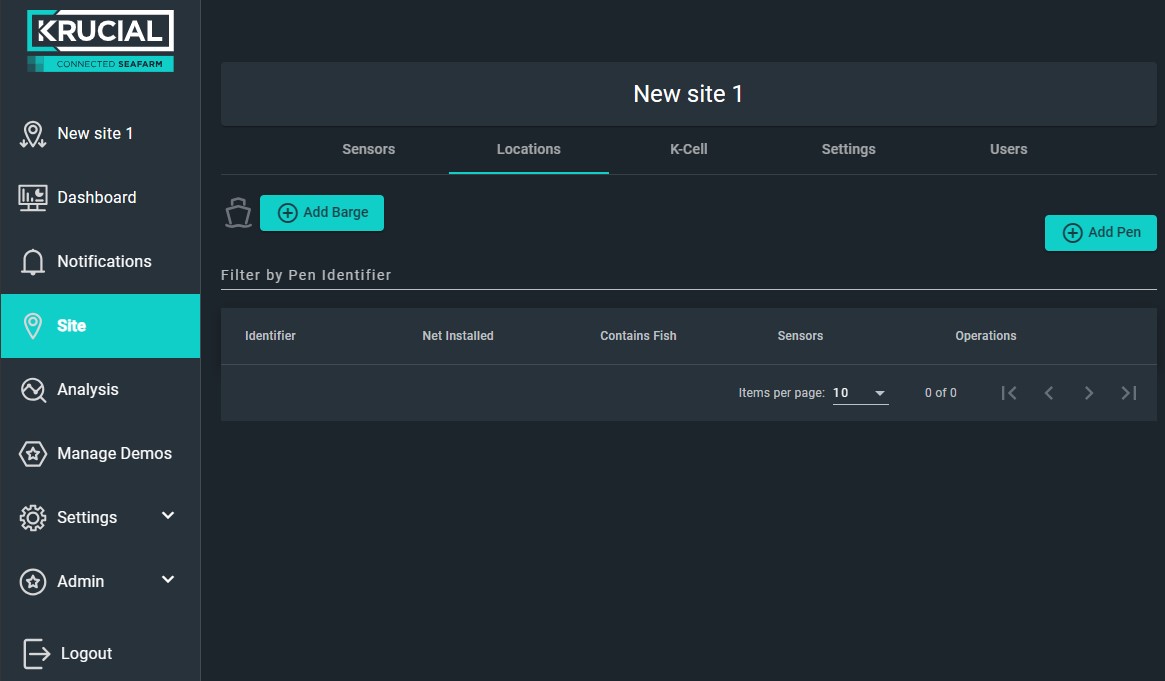
To add a Barge, press + Add Barge. A notification will appear at the top of the screen saying "Barge added successfully".
Singular or multiple Pens can be created at the same time by pressing the + Add Pen button, which brings up the New Pen form:
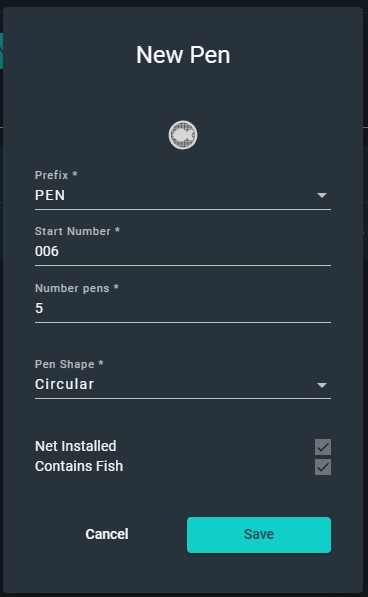
Choose your Pen preferences. If creating multiple pens, default numbering will begin at the Start Number and increase by 1. When done, press Save:
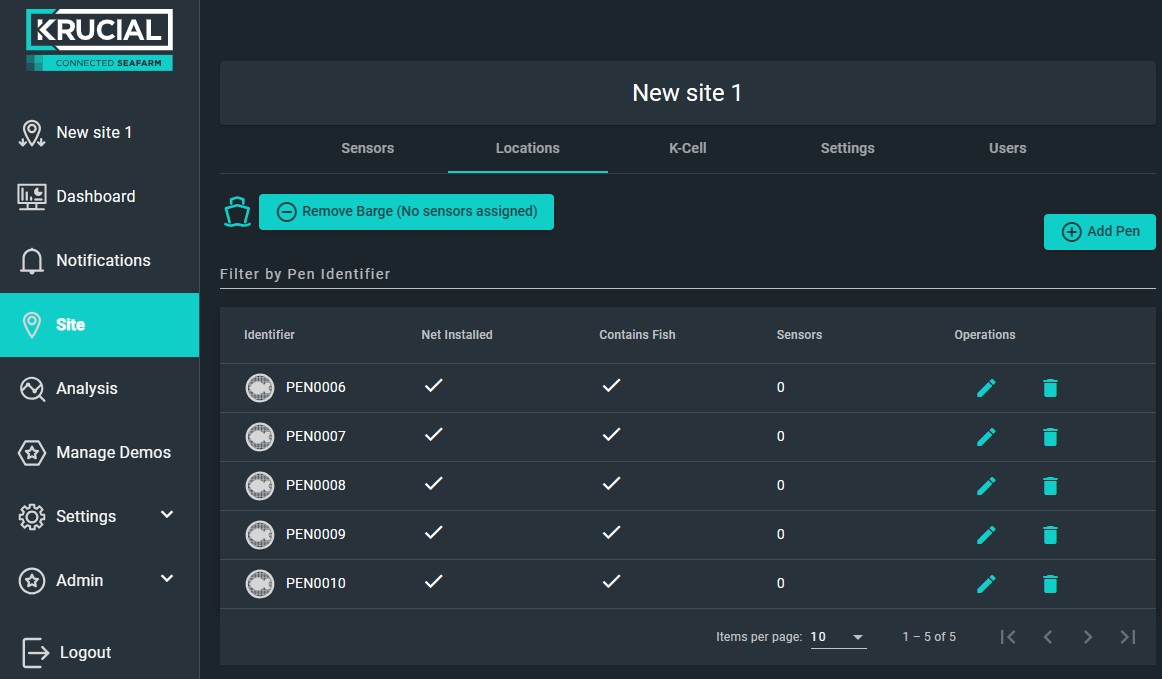
Each pen can be edited individually by pressing the  , or deleted by pressing the
  :
:
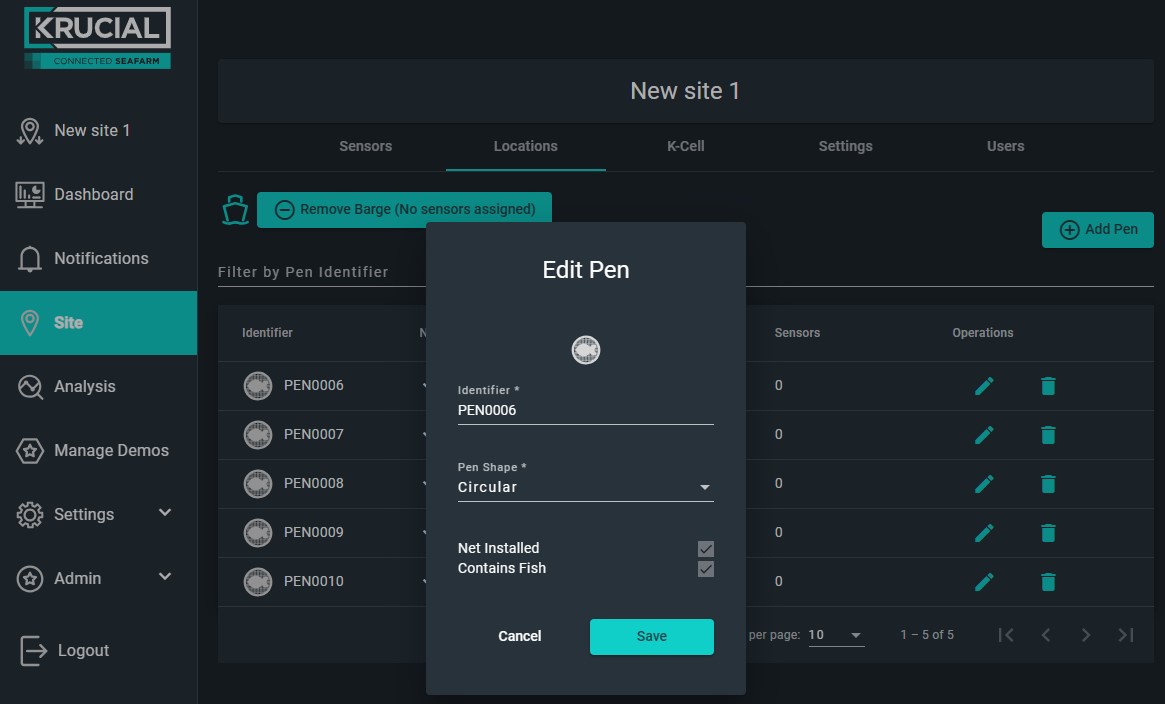
Once your Locations are created and your Site has a K-Cell, you can begin placing sensors.
Site > K-Cell
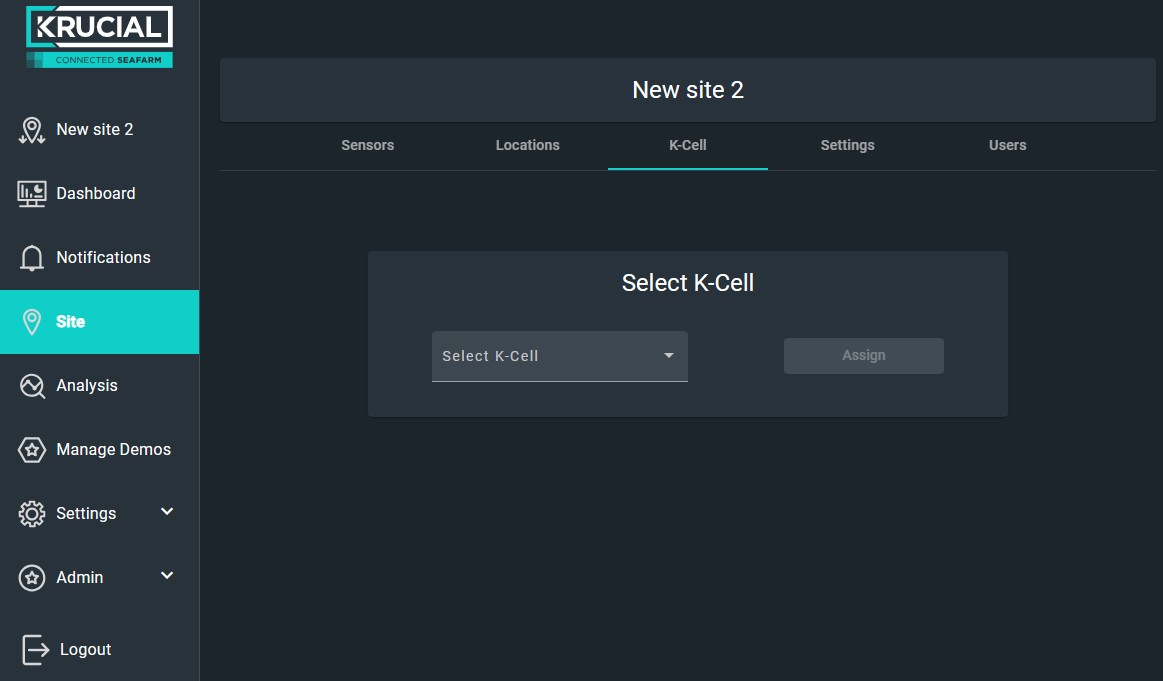
Krucial will assign your K-Cells to your organisation. When you create a Site, before you can add sensors you will need to assign one of your K-Cells to it, by selecting from the drop-down list and pressing Assign:
Once a K-Cell is assigned, the page will look like this:
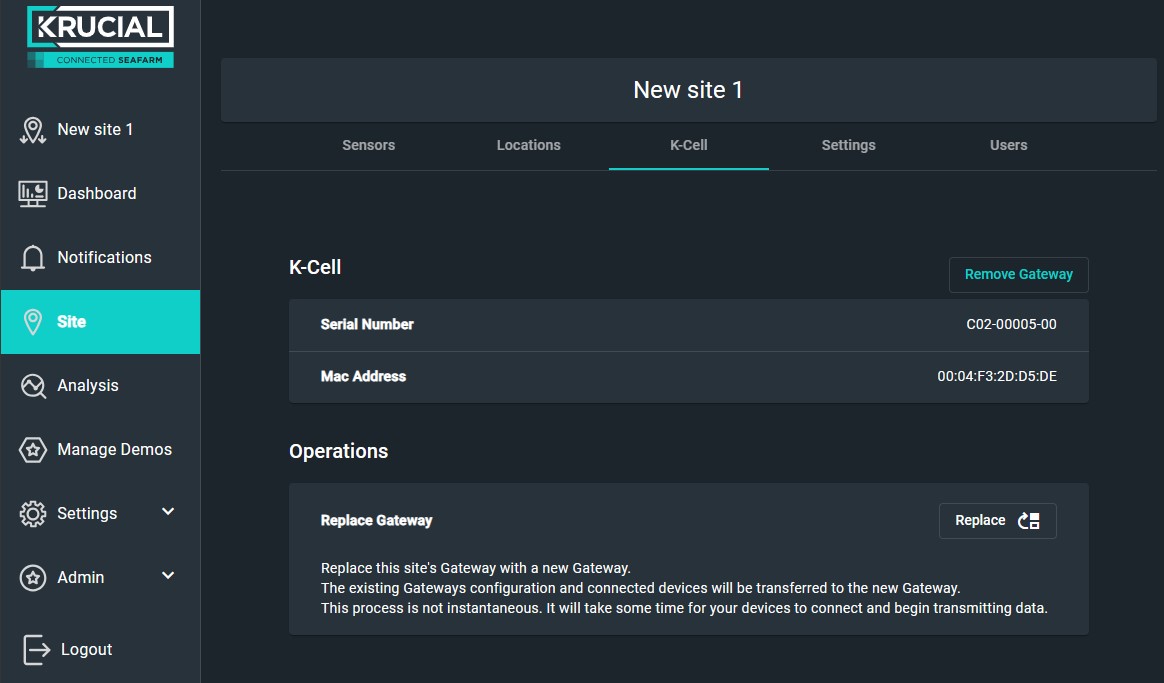
The two functions that can be performed here are:
Remove Gateway - this will remove the K-Cell from the site - e.g., if you are moving it to another site ( Note - a K-Cell cannot be removed from a site until all the Sensors assigned to the site have been removed from their locations and this has synchronised with the K-Cell (which can be up to 2 hours depending on data frequency agreed).
Replace - If a K-Cell needs to be swapped out, and you want to keep everything the same on your site, this is the option to use. It allows swapping to another unassigned K-Cell in your organisation while keeping all the other sites, sensors, locations, alert thresholds the same.
Site > Settings
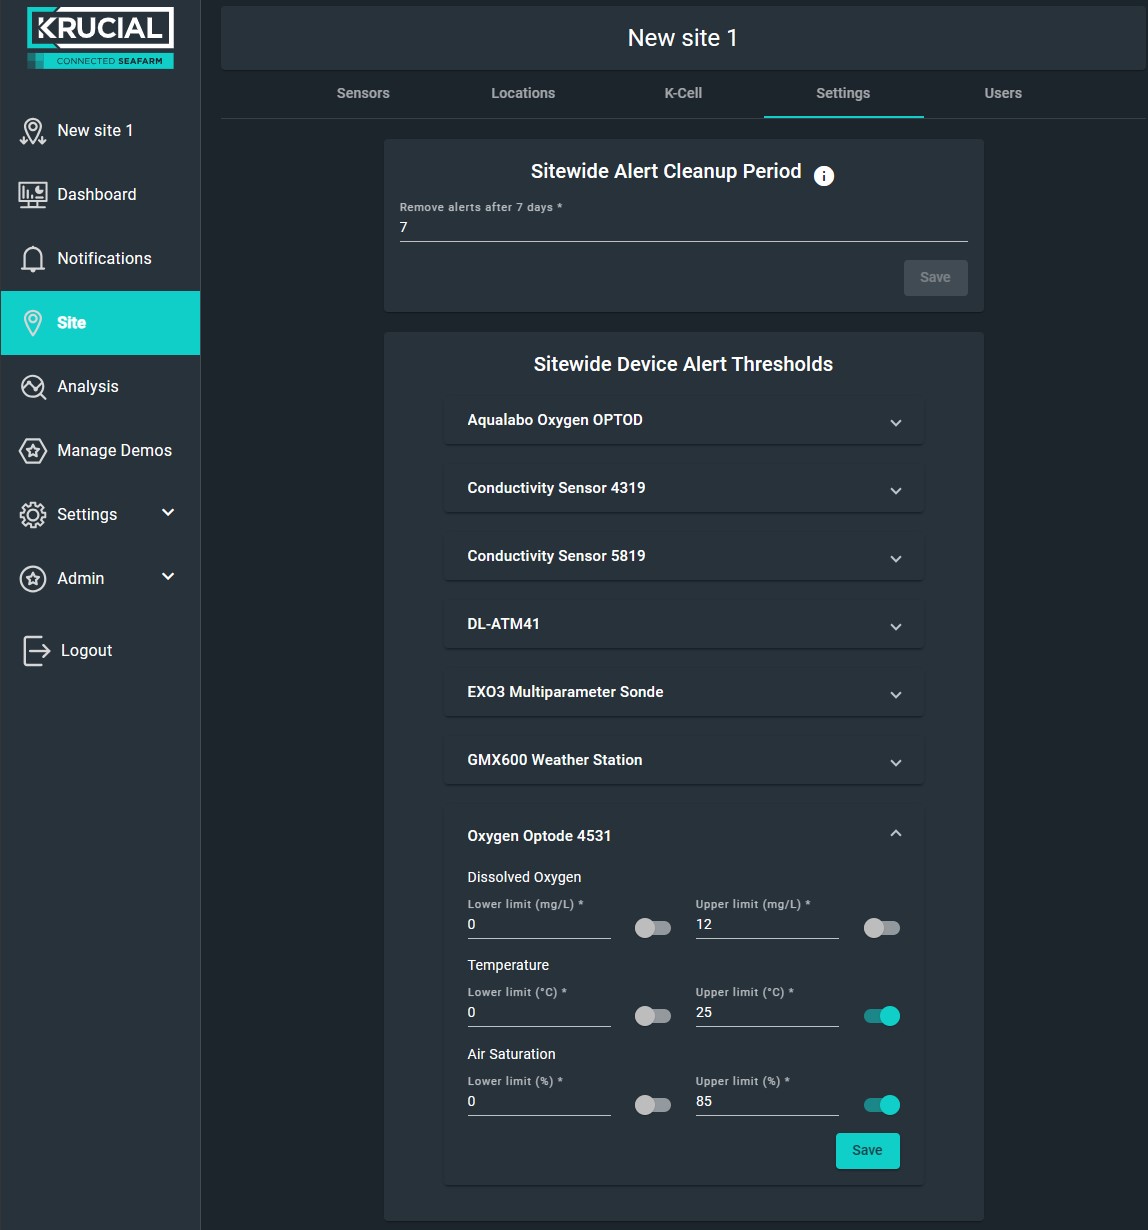
Alert Settings
This is the number of days after which Notifications Alerts are auto-deleted and moved into Events.
Alert Generation Thresholds
This is where notification thresholds for each type of sensor on the site are set. Enter the lower or upper limit for a sensor value for which you want to receive a notification, toggle the switch on, and press Save.
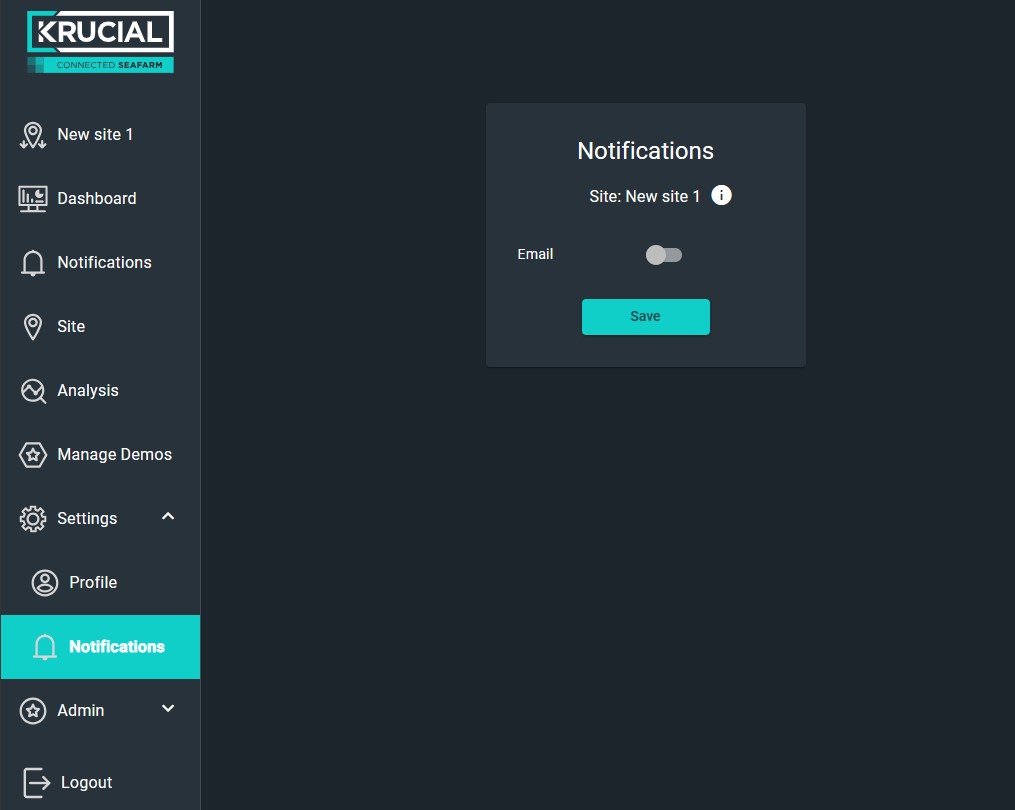
To change how you receive notifications go to Settings > Notifications.
Site > Users
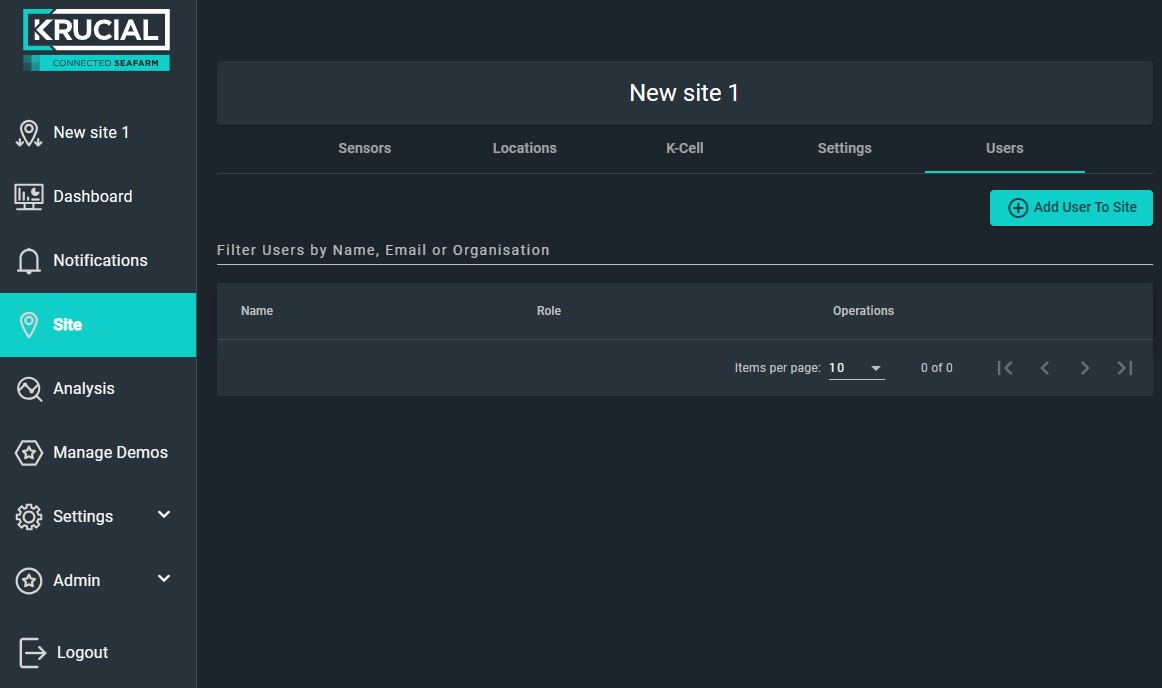
Only available to Site Admin and Admin users.
Here you can add other users in your organisation to the site. As an Admin you can add users in any role. As a Site Admin you can add users in Site Admin and Site User roles.
To add a user, press the Add User To Site button:
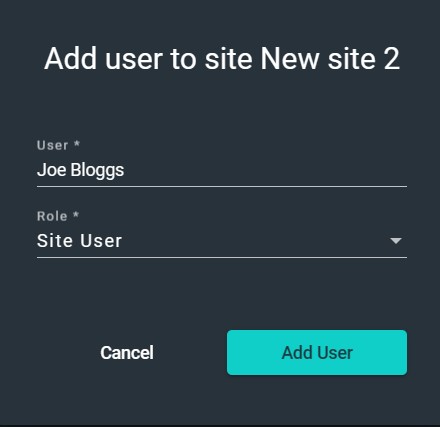
Start typing the user's name and select them from the drop-down menu. Set the user's role then click Add User to confirm:
Analysis
Analysis allows you to see your data in more detail. First select the location on the site, then select the sensor you want to view data from:
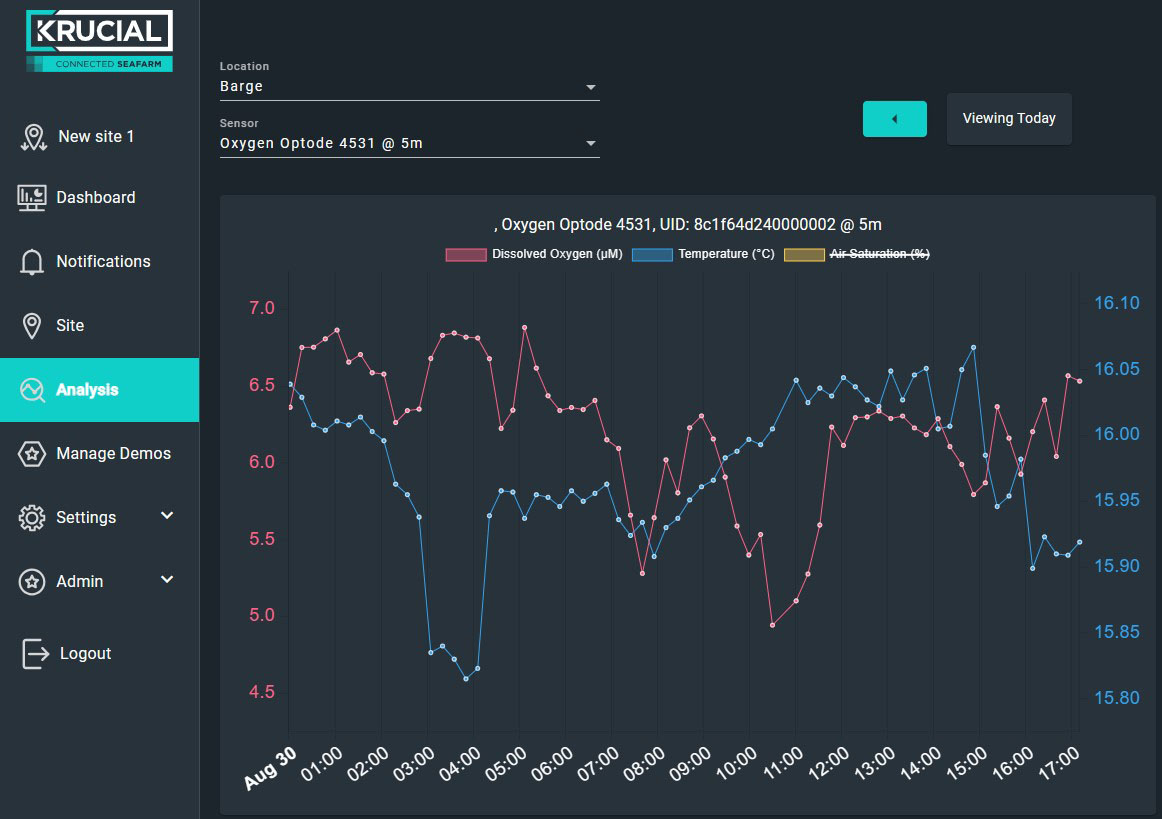
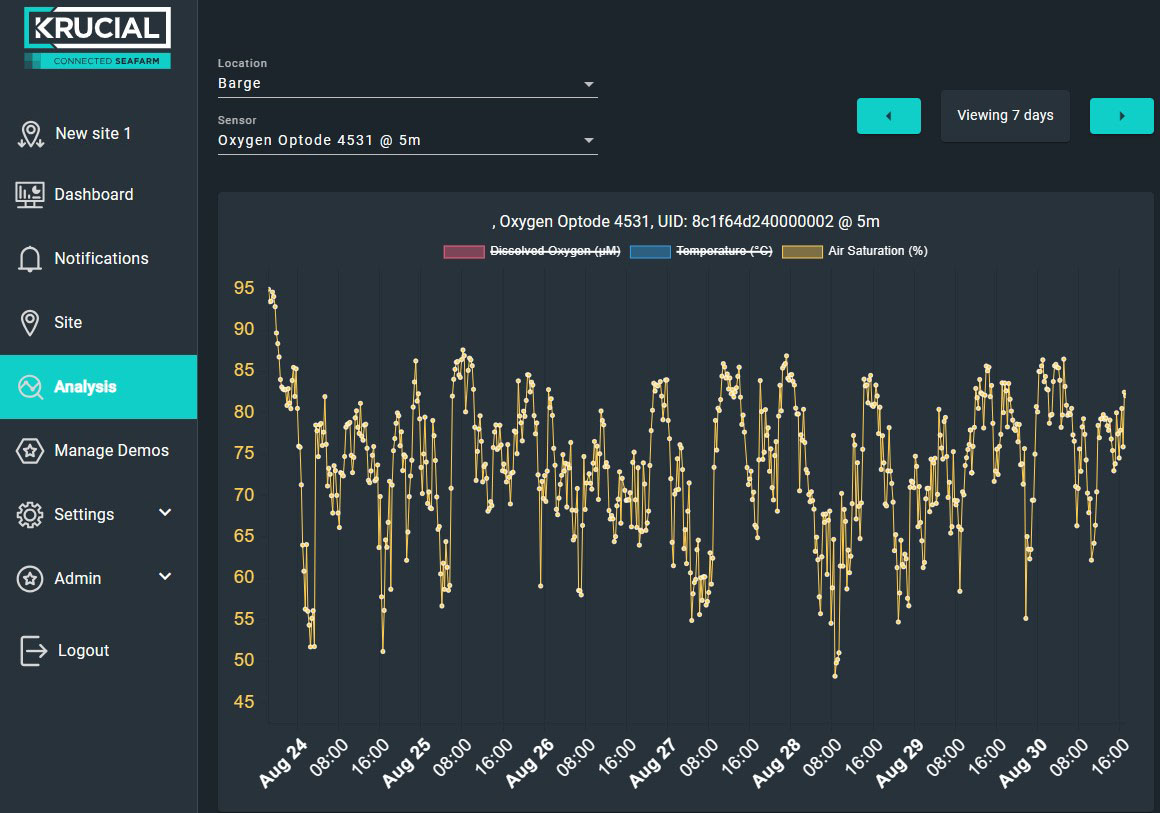
Pressing the arrows in the top right changes the time period of data displayed, while clicking on any of the parameters above the graph will show/hide them:
Settings
Settings on the left hand menu is for user preferences.
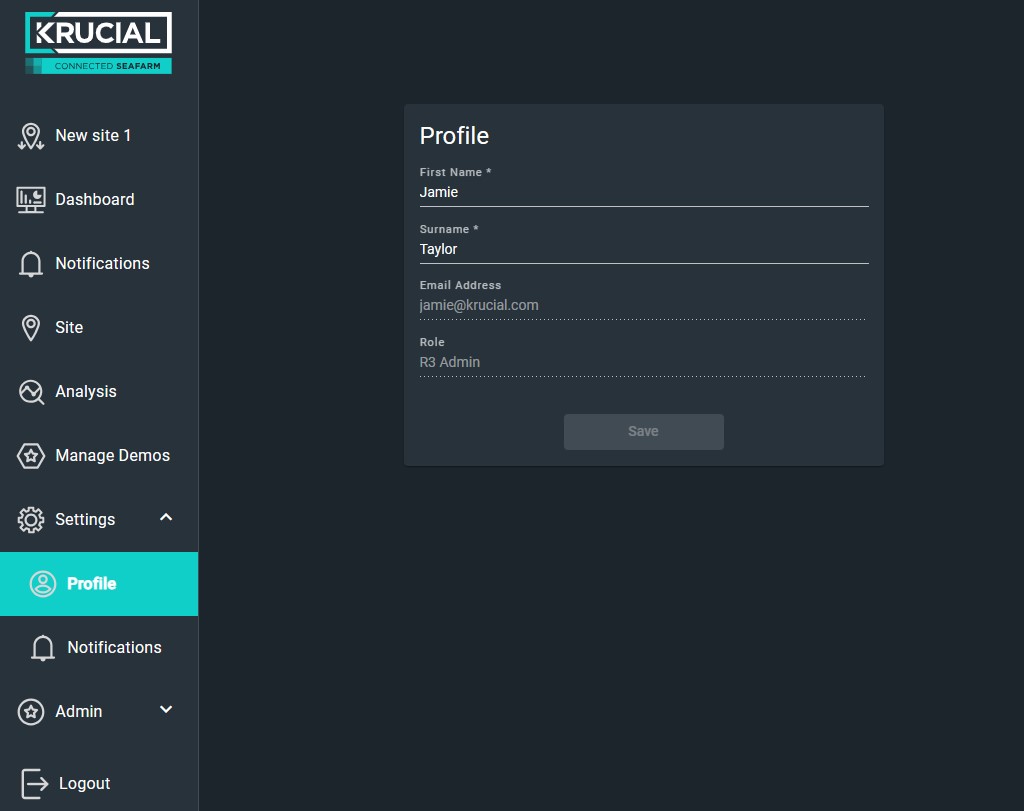
Settings > Profile
Profile gives you the option to change your name:
Settings > Notifications
Notifications allows you to toggle on/off all site alerts sent to your mobile or email:
Admin
Only available to Site Admin and Admin users.
Admin > Sites
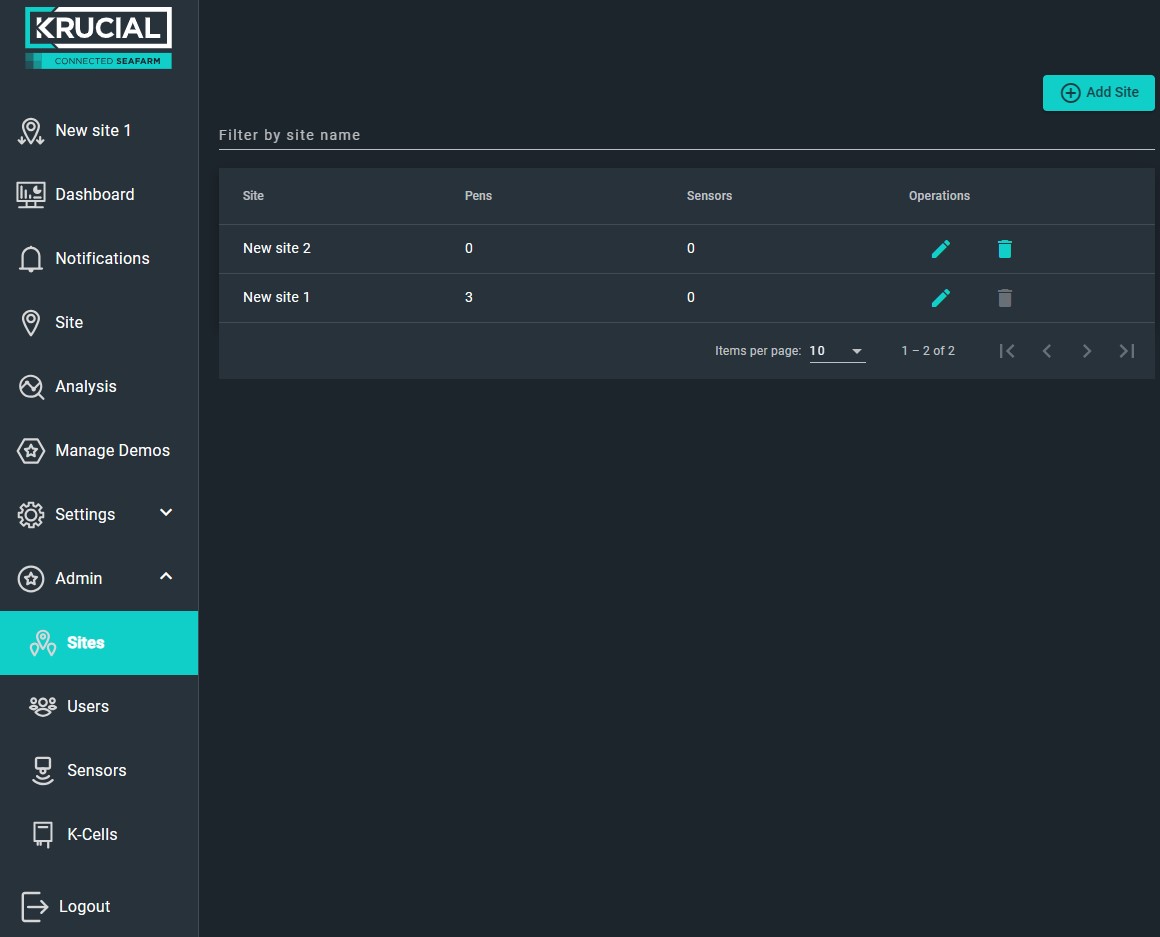
As an Admin, here you can see all your sites listed.
Edit or delete a site
Press on the  under the Operations column to edit the name of a site or the
  to delete a site (Note - Sites can only be deleted once all sensors are removed from their locations, and the K-Cell has been removed from the site):
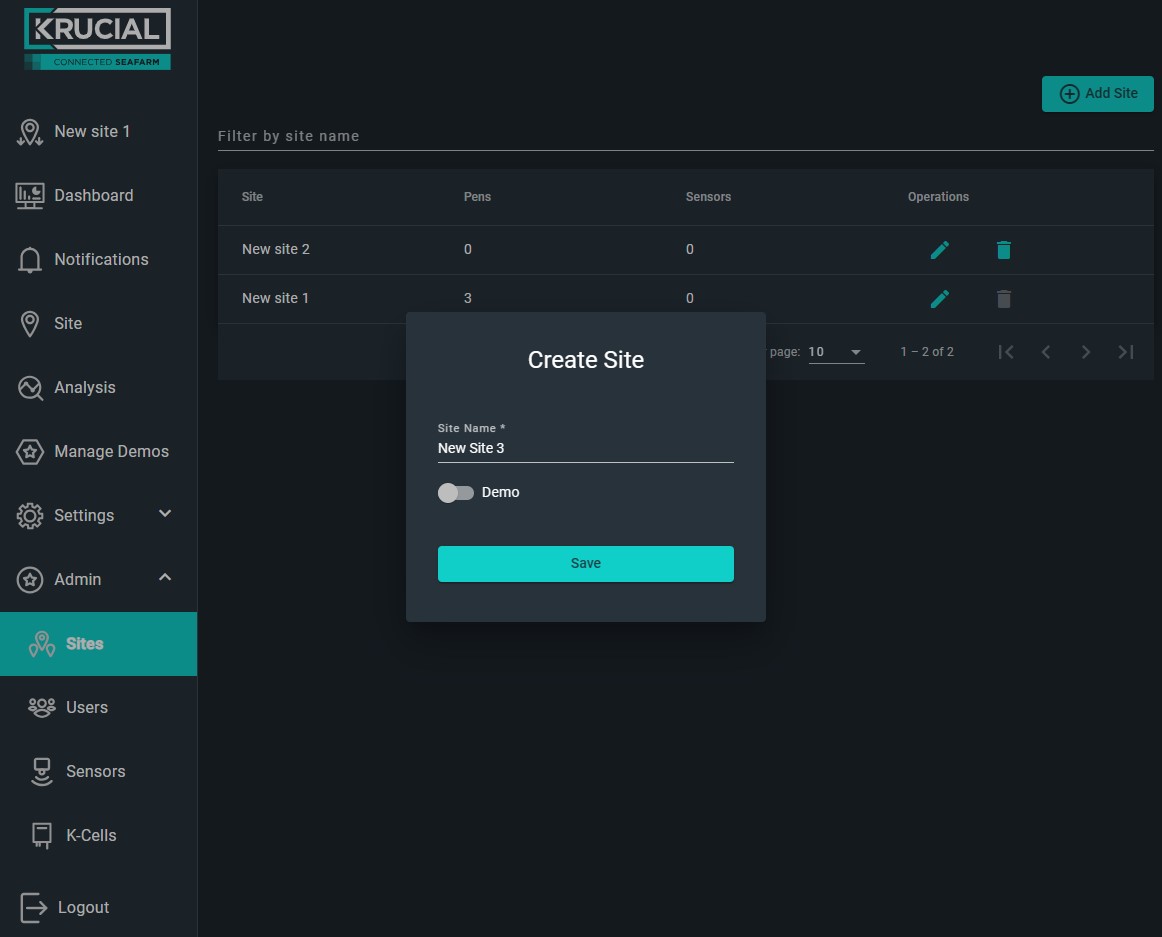
Create a new site
To create a new site, press the + Add Site button in the top right. The "Create Site" box will pop up, where you can enter a name for your new site and press Save:
Admin > Users
As an Admin or Site Admin, here you will see a list of all users in your organisation and their roles:
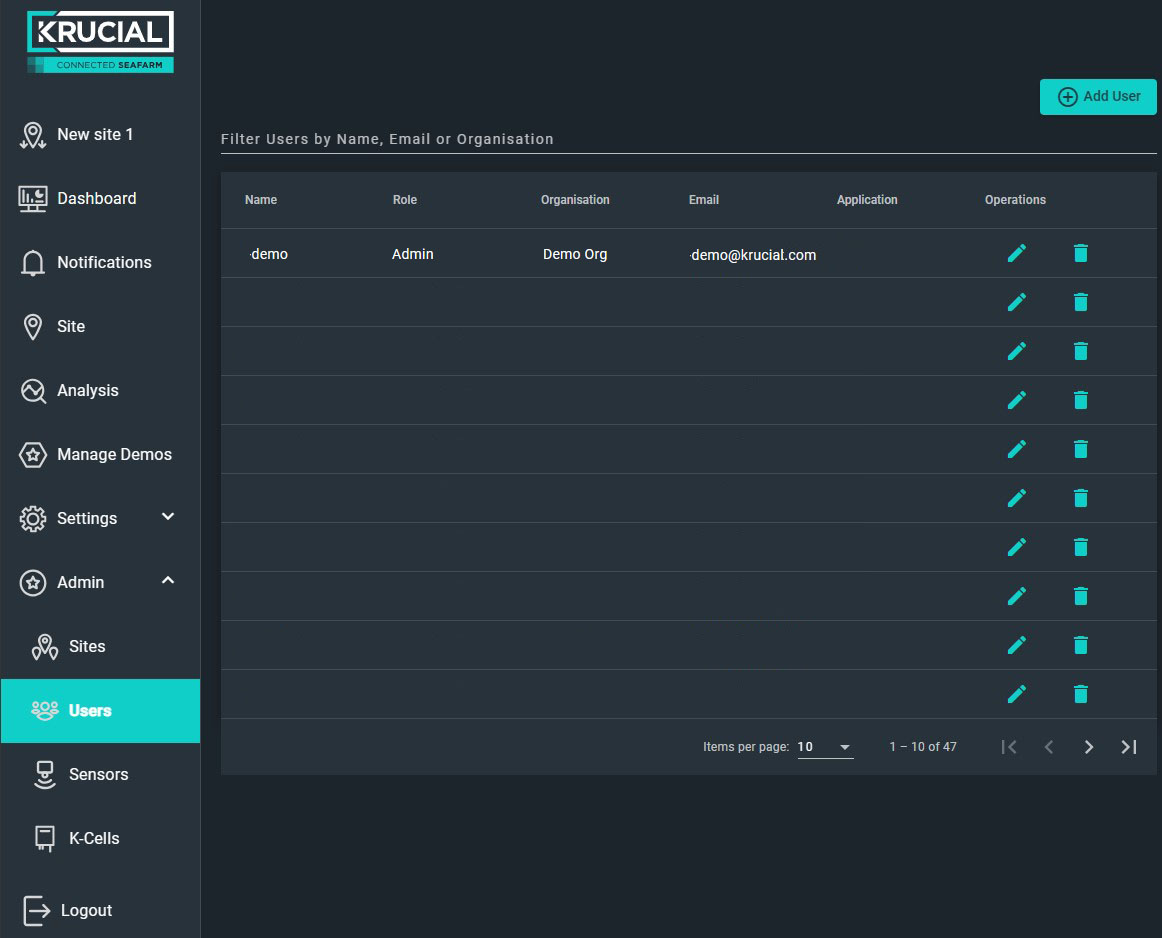
To delete a user press the  at the end of the row.
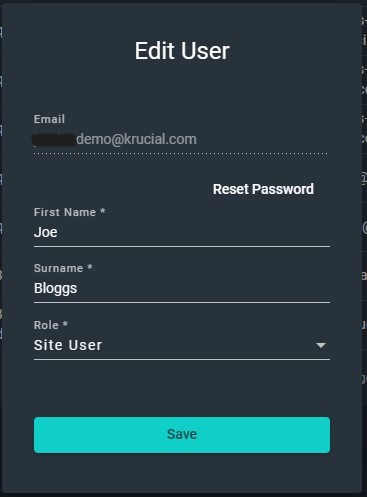
To edit a users name or Role, or reset their password, press the  at the end of the row to bring up the "Edit User" box:
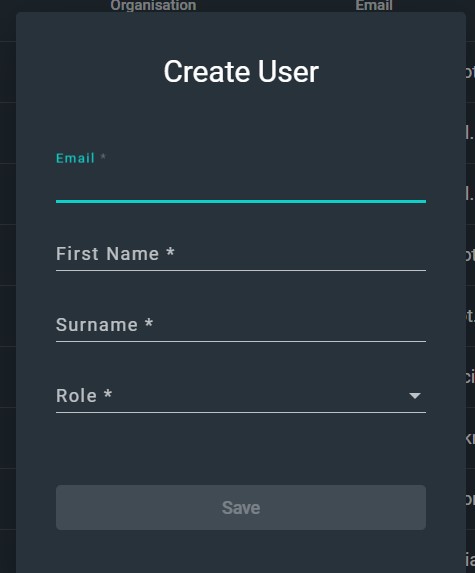
To create a new user press the + Add User button in the top right and the "Create User" form will appear:
Permissions for different user Roles
Admin > Sensors
Move a sensor to another Connected Seafarm site
Find the sensor you want in the list, you can use the filter to search its DevEUI or sensor type. Under Site there will be a  symbol, press this to select a site to add it to.
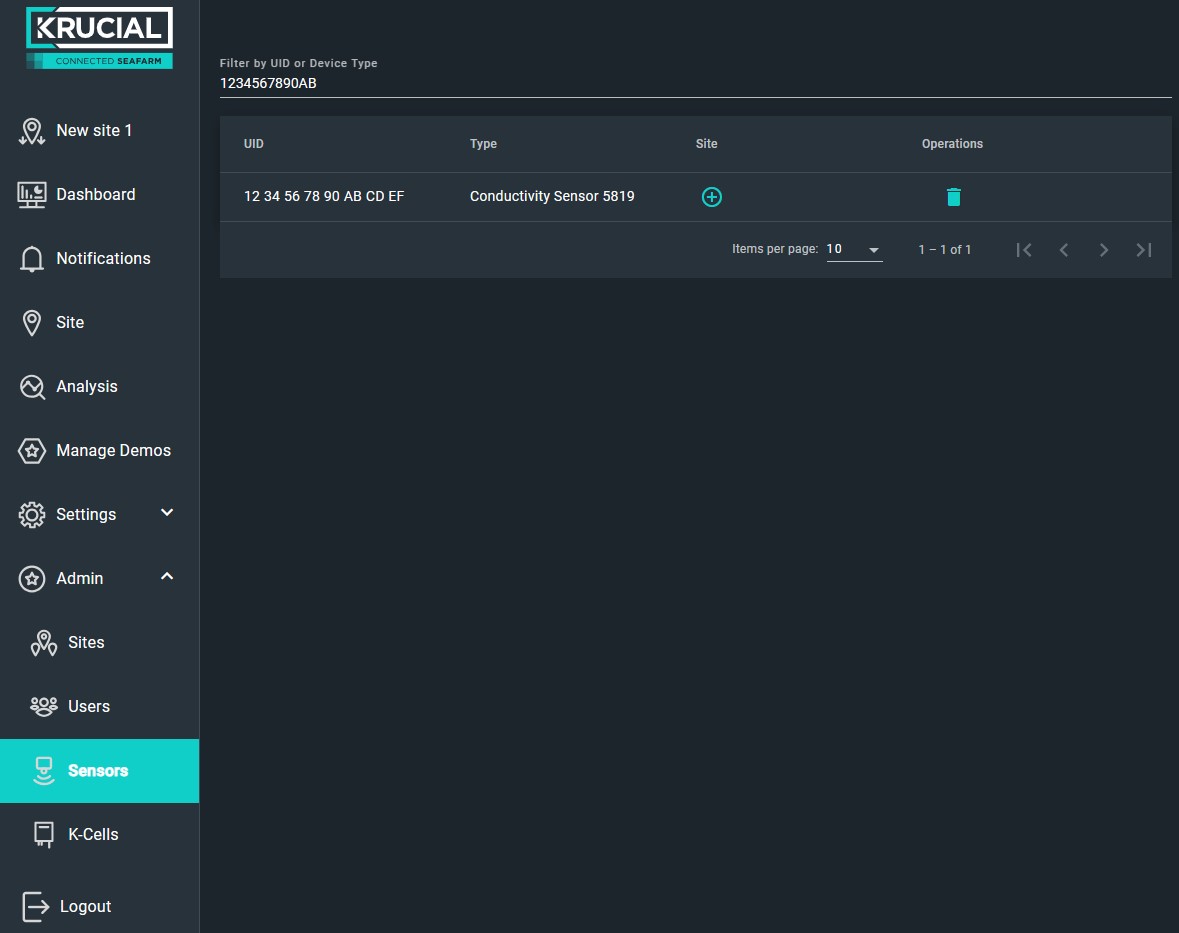
If there is no  then you will first need to go to the correct site, then go to Site > Sensors and follow steps to delete it from its current site.
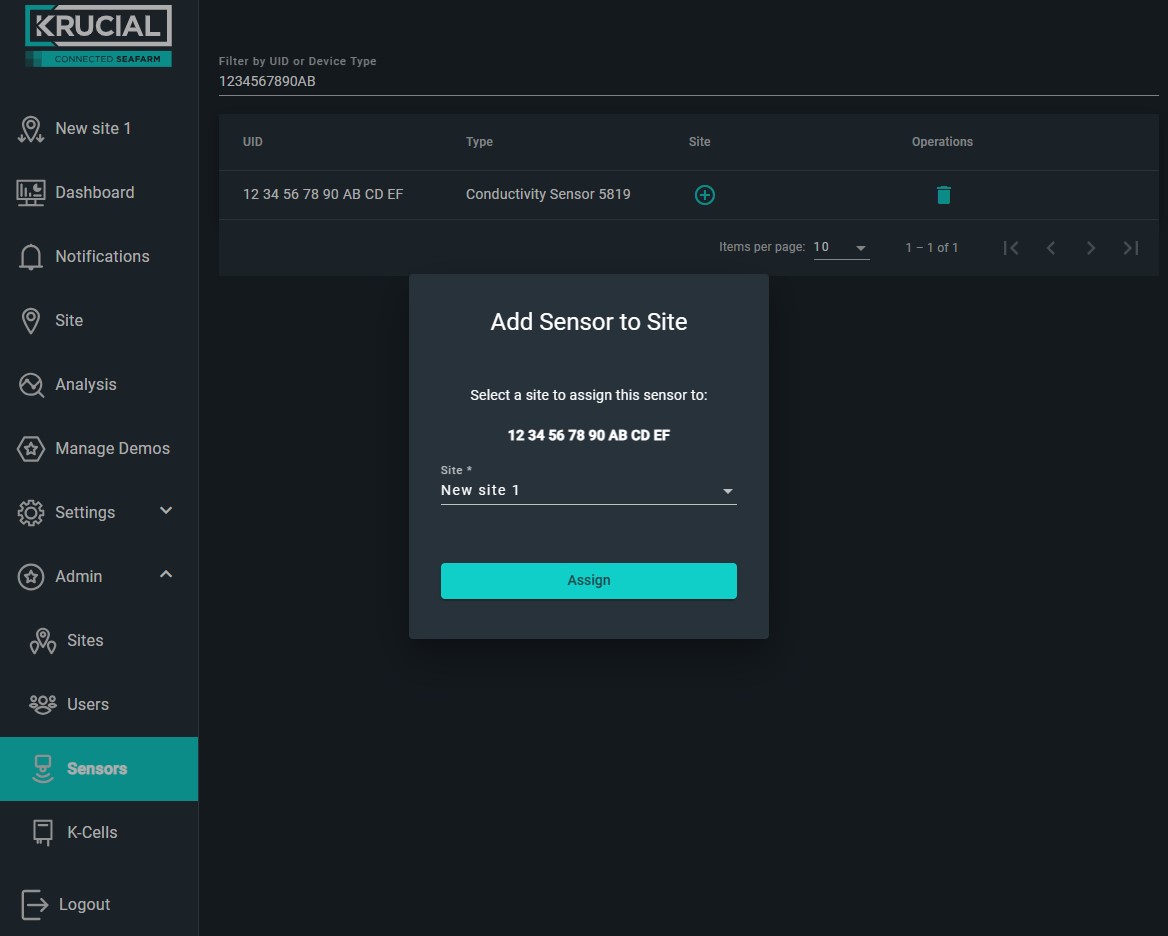
Select the Site you would like to assign the sensor to from the drop-down menu, and press Assign.
Delete a sensor
You may want to completely delete a sensor so that it can be added to another Application (such as Krucial Connect) or organisation. Do this by pressing on the  icon (Note - the sensor must be removed from any site before this can be done).
Admin > K-Cells
Here you will see a list of all the K-Cells available to your organisation and what Site they are on.
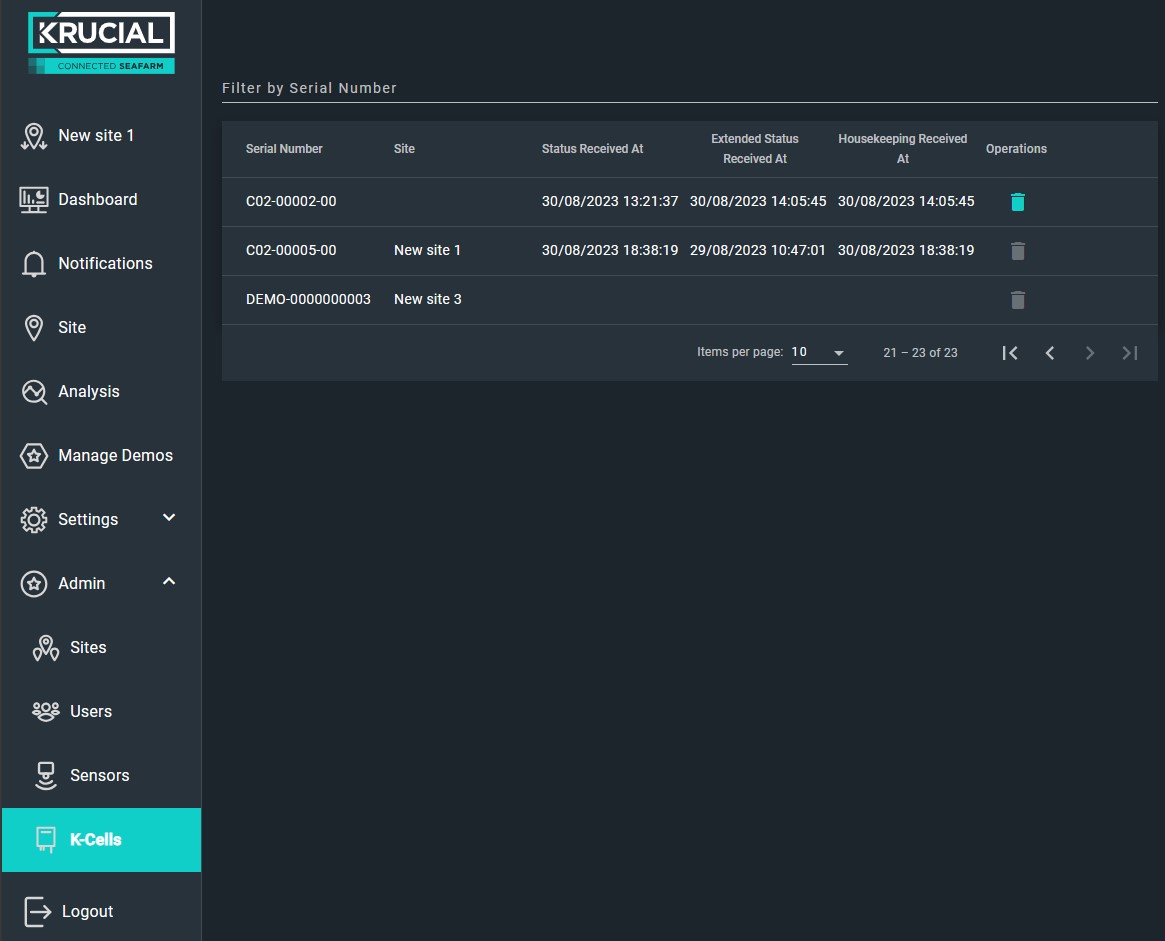
Seeing the Received status' tells you when the K-Cell last communicated telemetry data to the K-Cloud.
If sensor data appears to have stopped, and it has been more than 24 hours since any of the three status' were last received, please check the power connection to your K-Cell on sit, and that there is no physical damage, movement or obstructions to the antennas.