K-Mote 3.0
The Krucial K-Mote Data Logger enables the conversion of wired RS232 and SDI-12 sensors to LoRaWAN wireless. The K-Mote then takes scheduled sensor readings and transmits them to the LoRaWAN network to which it is connected, including the Krucial K-Cell. This enables sensors to be switched off between readings to conserve power, so that a small off-grid power source such as a small solar panel can power them indefinitely.
It's rugged design, similar to that of the K-Cell, enables it to be used in challenging environments.
K-Mote Specification
Physical Specifications
| Property | Specification |
|---|---|
| Enclosure dimensions | 160 mm x 160 mm x 90 mm 6.3" x 6.3" x 3.53" |
| Mass | 2.6 Kg |
| Mounting | Wall & pole |
| IP ratings | IP68, UL50E Type 6P |
| Certifications | CE, FCC, ISED, UKCA, RCM, RSM |
Power
Input:
| Type | Voltage Range | Current spec |
|---|---|---|
| AC 50/60Hz | 110-240V | 0.25A/115V 0.25A/230V |
| DC | 12-24V | Inrush/Max 1A/12V 0.5A/24V |
Battery: The K-Mote's inbuilt battery life depends on the sensor used and frequency of readings, but is generally a couple of weeks, plenty to cover downtime of an off-grid input such as a small solar panel.
Sensor communications
| Protocol | Voltage |
|---|---|
| RS232 | 5V or 12V |
| SDI-12 | 12V |
Note that LoRaWAN frequency is region dependant. The appropriate K-Mote is required for your region(s) of use.
Backhaul
| Radio Protocol | Frequency | Range |
|---|---|---|
| LoRaWAN | 868\915Mhz | \< 15 Km |
Note that LoRaWAN frequency is region dependant. The appropriate K-Mote is required for your region(s) of use.
Integrated sensors
Sensors that are already integrated for use with the Krucial K-Mote: Aanderaa Optode 4531 - Dissolved oxygen and temperature Aanderaa Conductivity 5819 - Salinity sensor
Off Grid solutions
The K-Mote can be powered by a small solar panel in most places, and so can be deployed almost anywhere. Speak to your installer or contact Krucial for more information.
Mounting the K-Mote
Positioning considerations
- Consideration should be given to the K-Motes power source. If using solar, the panel should be facing the equator and be in direct sunlight for as much of the day as possible.
- The K-Mote must be mounted with at least 300mm clearance from any obstructions below it, for cable and antenna connections.
- LoRaWAN can work at up to 15km separation between transmitter and receiver with a direct line of sight. If there are obstacles this will be reduced. How much the range is reduced by will depend on how much obstruction there is, and the materials obstructions are made from.
Pole mount
Jubilee clamps (supplied)
The K-Mote is supplied with jubilee clamps that will enable it to be mounted to a pole with a diameter of up to 150mm. If a larger diameter pole mounting is required, larger diameter clamps should be sourced locally, with a thickness of less than 20mm.
- Starting with the upper bracket, thread the jubilee clip through one of the inner slots on the front of the K-Motes mounting bracket. If a larger clamp and pole diameter greater than 120mm is being used, the wider slots should be used to give the K-Mote better grip on the pole.
- Wrap the clamp strap around the pole, and thread back through the opposite slot.
- Thread the end into the opening of the clamping mechanism and tighten until the K-Mote is secure.
- Repeat to clamp the lower bracket to the pole.
U-bolts (not supplied)
The K-Mote can be mounted using U-bolts with thread diameter 5-8mm, and inner spacing between 48-66mm. Penny washers (otherwise known as mudflap washers) are required between the nut and the K-Mote's mounting bracket.
Wall mount
- K-Mote must be mounted 300mm clear of any obstructions below, for cable and antenna connections.
- 4x 6-8mm diameter fixings should be used, one in each corner. These are not supplied.
- Suitable fixings should be procured for securing the 2.6kg k-Mote to the wall material.
K-Mote interfaces
This is the base of the K-Mote, where all connection interfaces are made, and the power switch can be found:
| Interface Position | Function/Connection |
|---|---|
| 1 | ON/OFF switch |
| 2 | Sensor cable |
| 3 | Status LED |
| 4 | Antenna |
| 5 | Power cable |
Antenna
The K-Mote is supplied with a LoRa antenna:

ON/OFF switch status

When the white mark on the switch is towards the sensor connector (right), the K-Mote is on.
Status LED
From initial power on the LED should fade in and out for 5 seconds as the K-Mote boots.
Then you can change the selected region for up to 30 seconds using the region swap tool for installers.
Then you will enter normal operation mode with the LEDs operating as shown below.
| LED Flash | Device State |
|---|---|
| Solid LED | Switch on; |
| One flash, every 30s | Normal operation |
| Two flash, every 30s | Battery low |
| Three flash, every 30s | Failed sensor read; failed LoRa transmission |
| Four flash, every 30s | K-Mote joining K-Cell |
| Five flash, every 30s | K-Mote awaiting sensor configuration from K-Cell |
| Six flash, every 30s | Power on self test |
Power
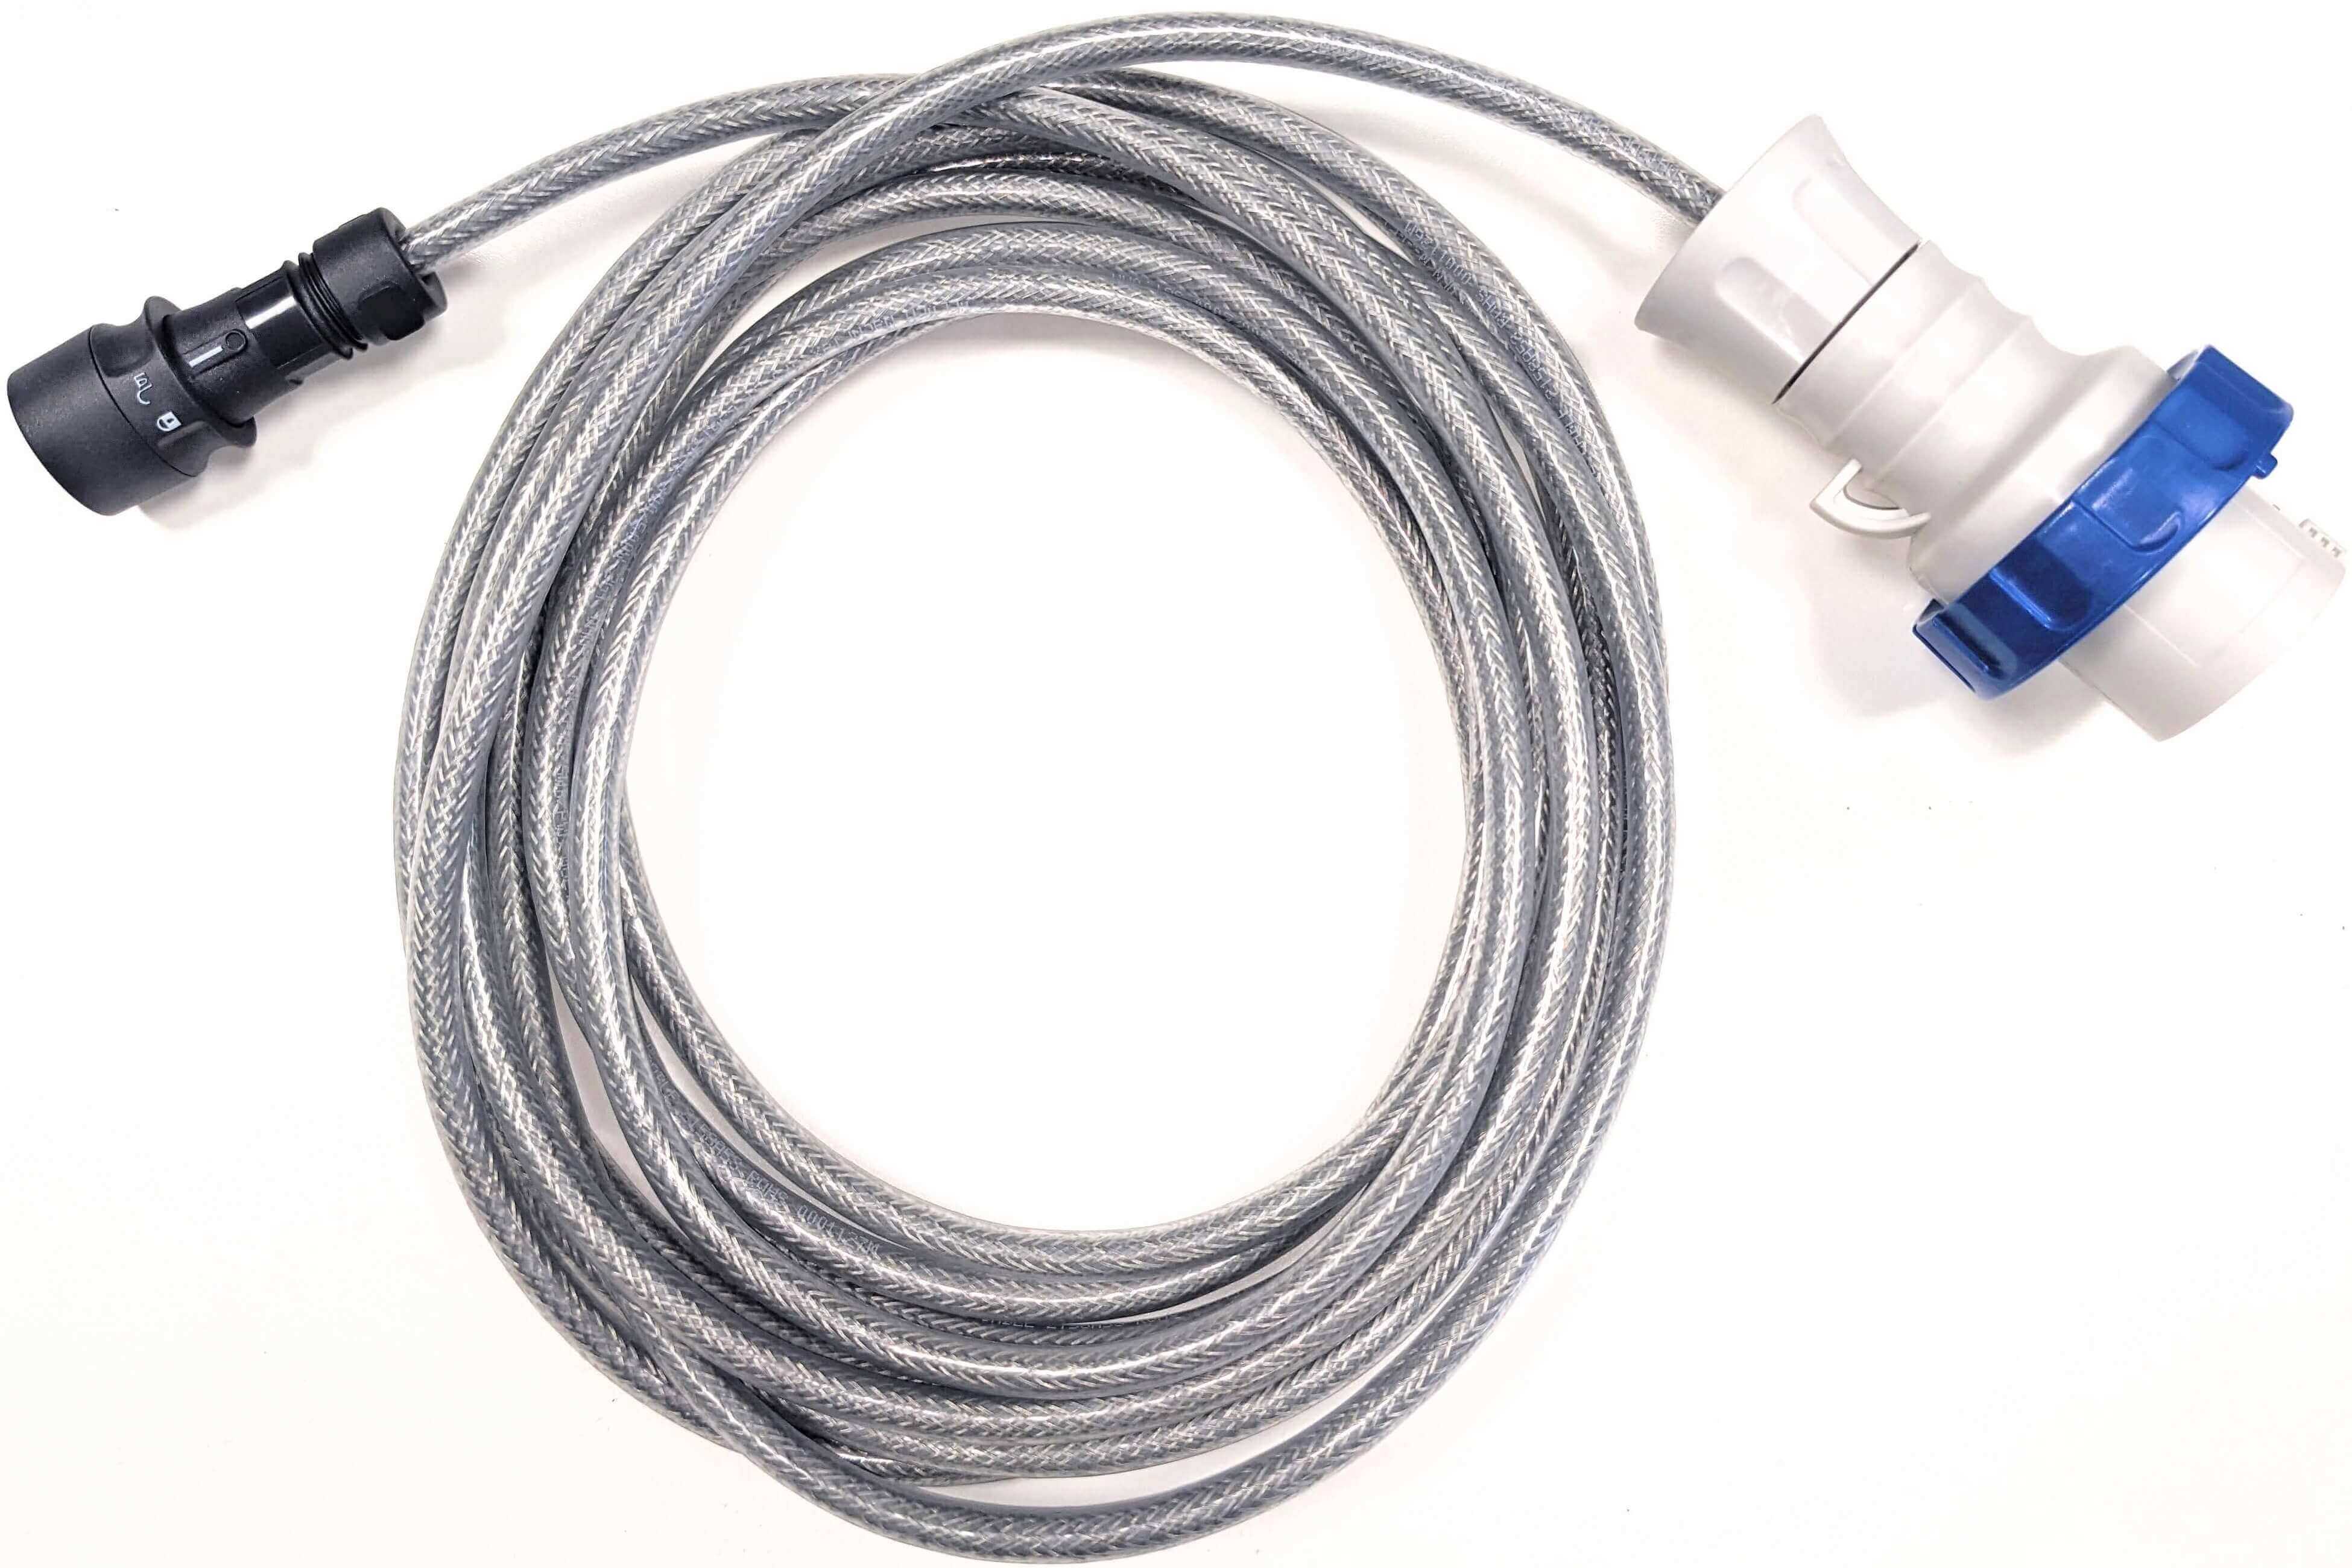
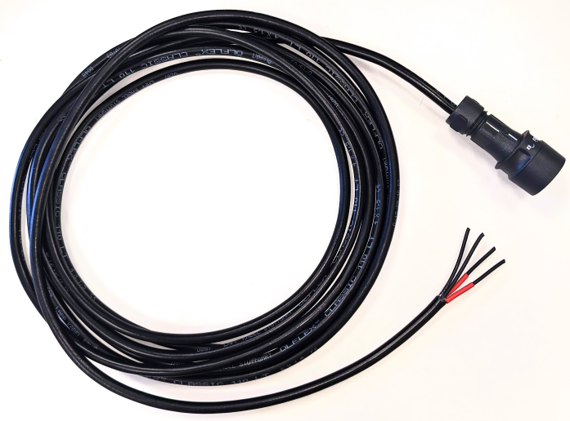
The K-Mote is provided with both AC and DC power cables. Power input ratings for each can be found in the K-Mote specification section.
AC power cable
| AC power supply WARNING: |
|---|
| The equipment must only be operated with a protective earth connection. In the permanent electrical wiring to the mains socket, a 3 Amp rated energy-isolating device, for example a fuse or circuit breaker capable of providing complete disconnection, must be provided in both the live and neutral phases. |
| Modification to the Krucial supplied AC power cable is not advised as it could lead to damage to hardware or a risk of electrocution, during or after installation. A suitable socket should be used to connect the plug (details below). |
| Installation of AC sockets for the AC power cable must only be undertaken by an electrician holding the relevant qualifications to undertake electrical installation work in the country of install. |
The K-Cell/K-Mote AC cable has an IEC 60309 standard plug (otherwise known as: CEE plug, Commando plug). This can be mated with any brand, where the specification is:
- Single-phase
- 16/20A rating
- 2P+E (other names: P+N+E, 2P3W).
- IP67 recommended (lower IP rated variants are compatible).
- Where AC supply is 100-130V, Key: 4h, indicated by a YELLOW socket/plug
- Where AC supply is 200-250V, Key: 6h, indicated by a BLUE socket/plug

The AC power cable supplied is 5m length. Using an in-line connecting socket, the AC cable can be extended, allowing for the K-Mote to be positioned much further from an AC power source.
DC power cable

The K-Cell/KMote DC cable comes as a flying lead, to be wired up to a suitable power supply on the installation. The cores are identified as DC+ with red heat shrink, and DC- without. The cores are also numbered along their entire length, so if the cable needs to be shortened the core functions can be identified as:
| DC cable core number | Function |
|---|---|
| 1 | DC + |
| 2 | Not used |
| 3 | Not used |
| 4 | DC - |
The DC power cable supplied is 5m length.
It is not recommended to position the K-Mote much further from a power source due to losses that will be experienced in the cable. If this is required, use 2x 1.5mm2/16AWG cores of a high-quality cable/wire, and junction with a waterproof connector or junction box. The longer the extension, the bigger the losses, and so the more powerful (above specified) the DC power supply will need to be.
Power cable connection
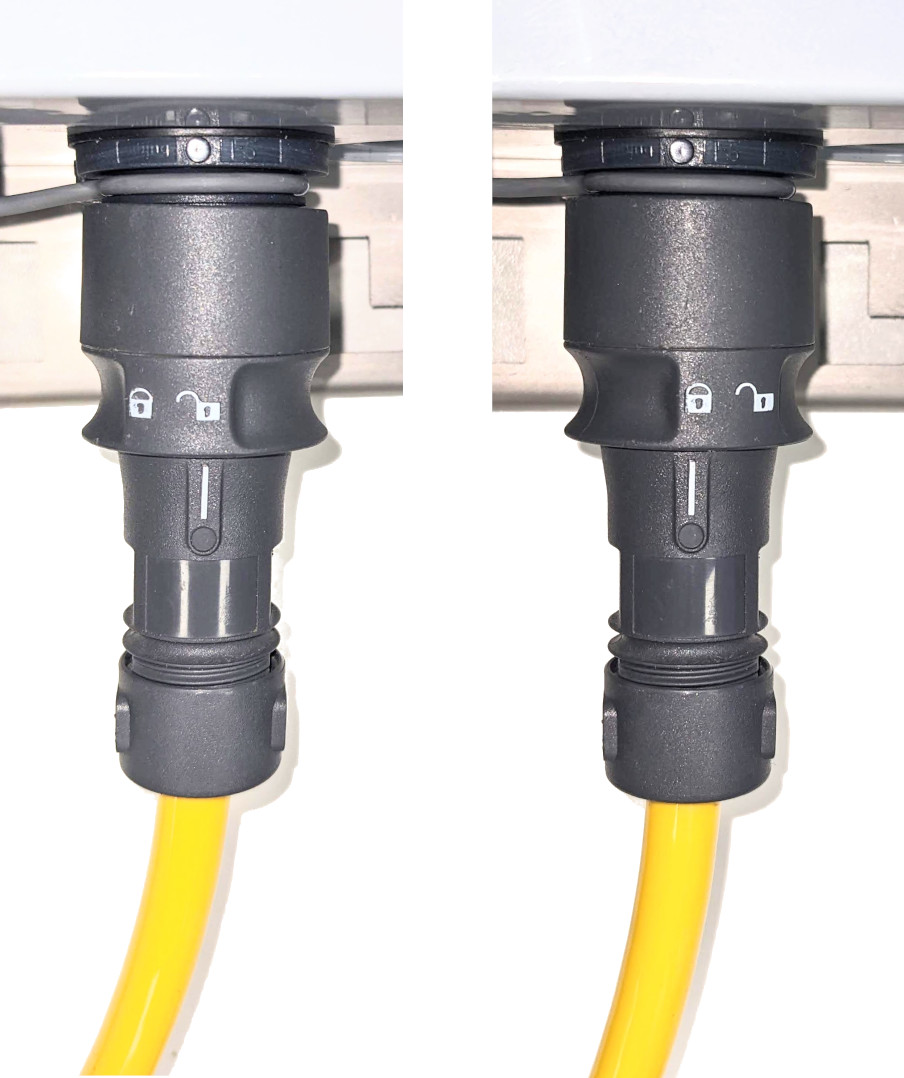
- Fit connector onto K-Mote socket and push into place.
- Twist locking ring to the right so that markers align.

- Connect other end to power source, with power source isolated.
- Secure cables to fixed objects, allowing slack at each end for strain relief.
- Switch on power source.
Sensor installation and connection
K-Mote integrated aquatics sensors
Connected Seafarm sensors that can be supplied by Krucial with the K-Mote include:
- Aaderaa 4531D Dissolved Oxygen Sensor
- Anderaa 5819 Conductivity Sensor
- Chelsea Technologies Trilux Chlorophyll Sensor
Information on installing these and connecting them to the K-Mote can be found here.
FAQs & Further Support
Sensor Issues
- Check K-Mote is switched on, the LED will flash every 30s if so, see LED status
- If the Mote is off, check that the power supply is working. The K-Mote's latest battery reading can be checked on the Aquatics dashboard under Site
- Check for damage to hardware such as cables, connectors or sensors
Diagnosing issues
| Possible cause | |
|---|---|
| Range | If the sensor is taken close to the K-Cell it is connected to, do readings start coming through? If so then it is likely that range or obstructions are the issue, consider if this could be improved by moving of the K-Mote |
| Power/battery | Battery level for all LoRa devices can be seen on the dashboard under Site > Sensors. If it has a power supply but is low, check the power supply is working and that there is power across the connector. If there is no power supply and is low, the battery may need replacing. |
| Other | Occasionally sensors or cables can become damaged through neglect or environmental factors. If a sensor provided by Krucial has obvious physical damage, please contact us at support@Krucial.com |
FAQs
How do I know that the K-Mote is switched on and working?
The power switch must have the white mark facing right, when looking at the K-Mote interfaces as displayed above.
The LED will blink every ~15 seconds when the K-Mote is on. Blink status's can be found under K-Mote interfaces.
Ensure that the local power system is working and connected. Use a multimeter on the power cable (connector positions 1 and 5 DC, positions 3 & 6 AC - WARNING - LIVE AC POWER MUST ONLY BE CHECKED BY A COMPETENT PERSON) to be sure that the power system and cable are working correctly.
If you are unsure, contact Krucial or your installer, and they will confirm that if the K-Mote is powered and functioning correctly.
Further Support
If you require any further help with Krucial Connected Seafarm please contact support using the form at: www.krucial.com/support